

Power Manager provides two tools that can be used to notify you if certain power or temperature conditions are met.
-
Policies are used to define monitoring rules that you wish to use in many places. A policy is defined once and can be applied at the room or cabinet levels.
-
Alerts are defined and applied at the device level.
Both policies and alerts use the same email notification system.
Any changes made in Power Manager must be published in order to be visible in EMX. Scroll to the bottom of this page for instructions on publishing changes.
Specify Who Receives Notifications
1. Open up Power Manager software from your computer. Start > All Programs > Packet Power > Packet Power Manager
2. Click on Set up in the Notifications area in the Power Manager ribbon. The system will display the Notifications setup dialog box.
3. Complete the Notification setup.
If you are sending notifications to more than one person, separate the email addresses with commas.
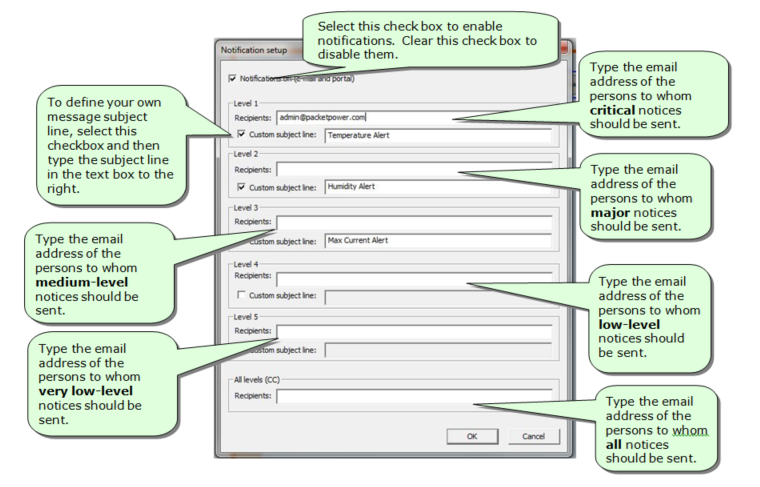
4. Click on OK to close the dialog box.
Create Policies
1. Click on Define Policies in the Notifications area in the Power Manager ribbon. The system will display the Policies dialog box with several example policies.
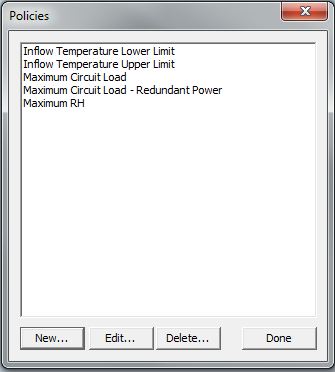
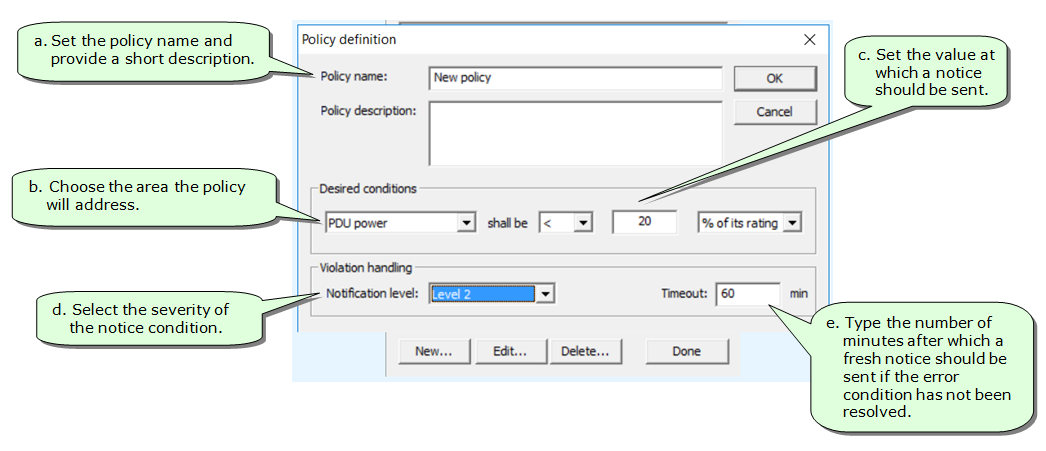
2. To add a new policy, click on the New... button. The system will display the Policy Definition dialog box.
a. Create a policy name and description.
b. Choose the area the policy will address
-
Power (W) or current (A) at the device level
-
Power (W) or current (A) at the PDU level
-
Temperature - takes all readings into account whether from power monitors or environmental monitors
-
Inlet temperature - this is specific to the air temperature entering the front of a cabinet and applies only to environmental monitors or probes placed in the front of cabinets
-
Relative humidity - requires an environmental monitor with humidity measurement
c. Set the criteria to be monitored by indicating a relationship such as "greater than", a numerical value, and "reading" if you want to use the absolute value (e.g. greater than 16 amps) or "% of its rating" to use a relative value (e.g. 40% of the rated amperage of a cable).
d. Choose the severity level for notices related to this policy
e. Specify the amount of time that should elapse before a new notice is sent out if a policy violation condition persists. Note this is reflected in minutes.
3. Click on Done to close the dialog box.
Apply Policies
Once you have defined a policy, it is available to be used in any room or cabinet within a layout. If you apply a policy at the room level, it will be in effect on all cabinets and devices within that room. Note, you have the option to exempt specific cabinets from a room-level policy (see Apply at the Cabinet level for instructions).
Apply at the Room level
1. To apply a policy at the room level, right click on a room in the main pane to bring up the Room configuration menu. Scroll down to see a list of all the policies you have defined for your layout.
2. To put a policy into effect for the selected room, click in the Value column and change the setting from "off" to "on".
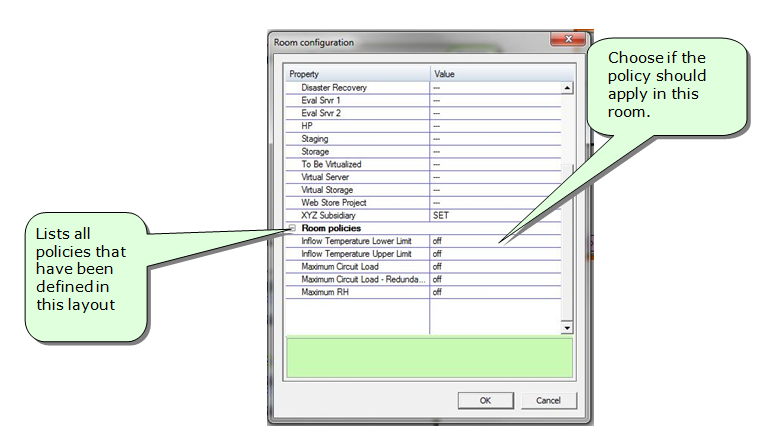
3. Click on the OK button to close the Room configuration menu.
Apply at the Cabinet level
1. To manage a policy at the cabinet level, select a cabinet by clicking on its name in the left panel of the Power Manager screen, then right click on the cabinet in the main pane to bring up the Cabinet configuration menu. Scroll down to see a list of all the policies you have defined for your layout.
2. Indicate how each policy should be applied to this cabinet.
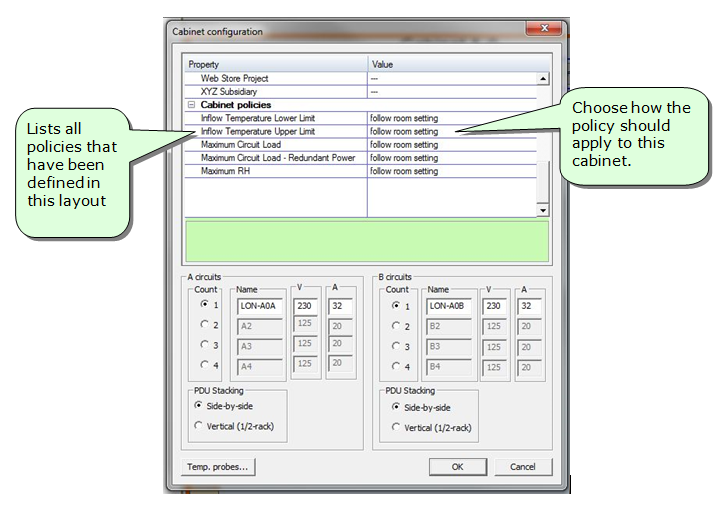
-
follow room setting: This is the default value and means that a policy that is set to "on" in the Room configuration menu will then apply to all cabinets in that room and what is "off" at the room level is "off" at the cabinet level.
-
always on: Applies a policy to the cabinet regardless of whether it is set to "on" or "off" at the room level.
-
always off: Never applies a room policy to the cabinet.
3. Click on the OK button to close the Cabinet configuration menu.
Edit or Delete Policies
1. Select Define policies in the Notifications portion of the menu bar.
2. Click on the policy you wish to modify. The policy will be highlighted.
3. Click on the Edit... button to make changes to the policy -or- click on the Delete... button to delete the policy.
4. Click on the OK button to close the dialog box and return to the Node configuration (or Device configuration) dialog box.
5. Click on the Done button to close the Define policies dialog box.
Create Alerts at the Device Level
-
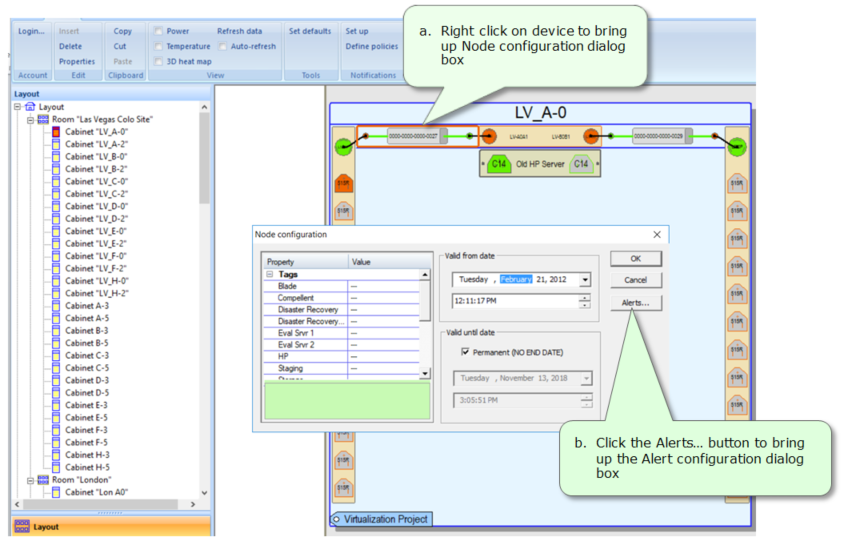
Select a cabinet by clicking on its name in the left panel of the Power Manager screen.
a. Right click on the monitoring device. The system will display the Node configuration dialog box.
b. Click the Alerts... button to display the Alert configuration dialog box.
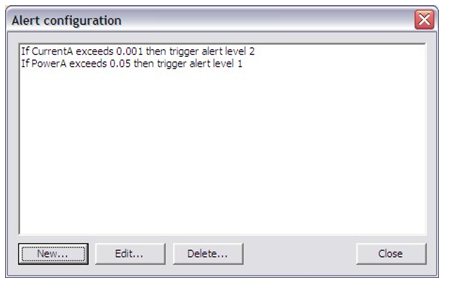
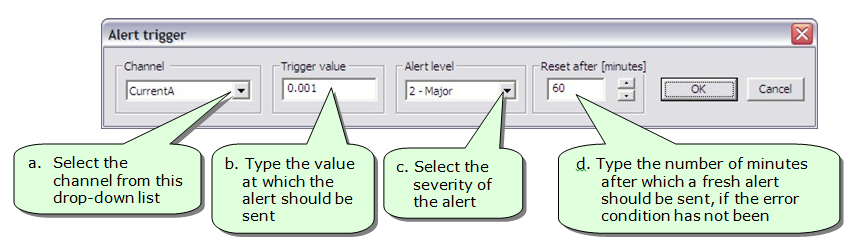
2. Click on the New... button. The system will display the Alert trigger dialog box.
a. Select the channel from the drop down list
b. Enter the value at which the alert should be sent
c. Select the severity of the alert condition from the drop down list
d. Enter the number of minutes after which a fresh alert should be sent if the error condition has not been resolved
3. Click on the OK button to close the Alert trigger dialog box and return to the Alert configuration dialog box.
4. Click on the Close button in the Alert configuration dialog box and return to the Node configuration dialog box.
5. Finally, click on the OK button to close the Node configuration dialog box.
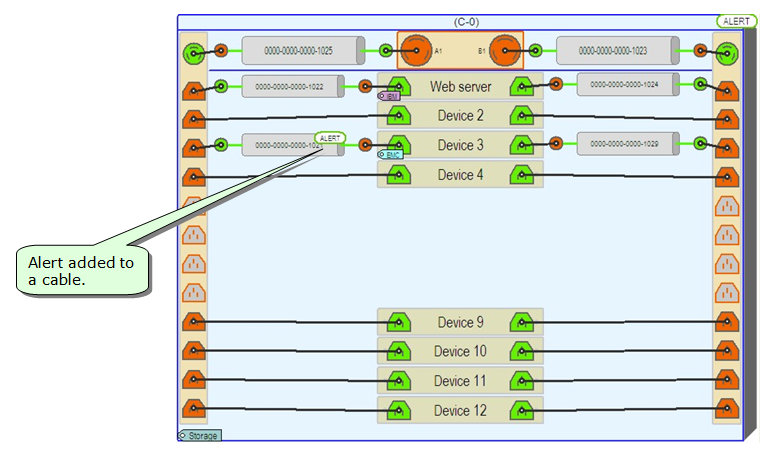
You should see an ALERT next to the device you selected in the cabinet view in Power Manager.
Edit or Delete Alerts
1. Select a cabinet by clicking on its name in the left panel of the Power Manager screen.
2. Right click on the monitoring device. The system will display the Node configuration dialog box.
3. Click on the Alerts... button in the dialog box. The system will display the Alert configuration dialog box.
4. Click on an alert criterion to select it then click on the Edit... button to make changes -or- click on the Delete... button to delete it.
5. Click the Close button to close the dialog box and return to the Node configuration dialog box.
6. Finally, click the OK button to close the Node configuration dialog box.
Publishing Changes
Changes made in Power Manager must be published in order to be visible in EMX - the system used to view reports. This is called "publishing the layout".
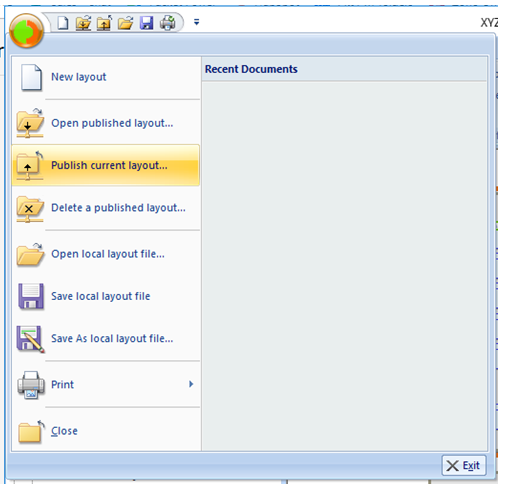
1. To publish a layout, click on the green and orange icon in the upper left corner to open the File menu.
2. Click on Publish current layout...
REMINDER: You must publish a layout in order for changes to go into effect and be visible in EMX.