

Before connecting or configuring a Packet Power WNC, SNMP data communication needs to be verified by performing an SNMP walk using the iReasoning MIB browser. Follow these steps to verify the SNMP communication of your Target Device.
Step 1: Download iReasoning MIB Browser
Visit: iReasoning MIB browser to download the iReasoning MIB Browser application.
This software is used to verify the communication of the Target Device.
Step 2: Connect PC directly to the Target Device
Using a Windows PC, connect the PC’s network port to the Target Device's network port using a network cable. Make sure you have a direct connection to the device with no router or network switch in between the PC and target device.
Step 3: Assign Static IP to PC’s Network Port
In order to communicate to the target device you will need to set the subnet of your PC’s network port to match the IP of the target device. This can be done under Network Settings → Adapter Settings.
Take note of your existing network configuration so you can revert your changes after this process.
-
Access Network Settings: Go to your PC's Network Settings and then to Adapter Settings. You're looking for the settings that control your PC's network card.
-
Record Current Settings: Before making changes, note down your current network configuration (IP address, gateway, subnet mask). This information is essential for restoring your original settings later.
-
Modify IPv4 Settings:
-
Find the network adapter connected to the target device (usually listed under LAN, High-Speed Internet, or Local Area Connection).
-
Open the adapter's properties, then locate and select 'Internet Protocol Version 4 (TCP/IPv4)'.
-
Choose to 'Use the following IP address' and enter an IP address that matches the target device’s subnet. This typically involves matching the first three sets of numbers in the IP address and altering the last set to a unique value within the same subnet. Example) target device IP: 192.168.123.123 , then set your static IP on the PC to 192.168.123.222. (this is the preset IP of the WNC).
-
Also, enter the appropriate Subnet Mask and Default Gateway that align with your Target devices settings.
-
.png?cb=27a7f4778219412ff413197b0cbe8870)
-
Verify Connection:
-
After applying these changes, check if you can access the target device by typing its IP address into a web browser or by using the 'ping' command from the command prompt.
-
See: https://windowsreport.com/how-to-set-static-ip-windows-11/ For detailed instructions on assigning a static IP on Windows.
Step 4: Establish Communication to a Target Device Using MIB Browser
Using your target device's IP address ensure you can access the target device from your Windows PC using the MIB Browser.
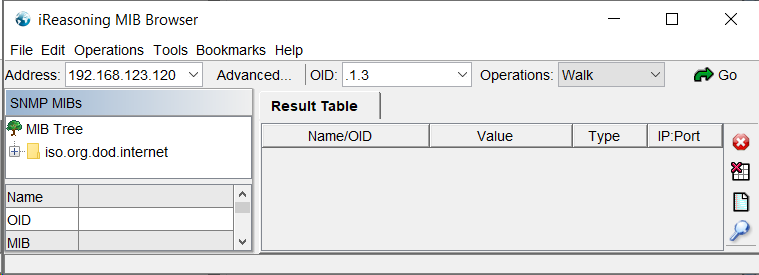
In the iReasoning app set the following:
-
Address: The IP address of the target device.
Under the Advanced tab set the following:
-
Port: The port through which SNMP communicates. The default port is 161.
-
Read Community: A password exclusive to your device. The default value is public.
-
SNMP version: Select SNMP v1 or v2 depending on your device. The default value is 1.
These settings ensure that your PC can communicate with the target device using the SNMP protocol, allowing for effective network management and data retrieval.
Step 5: SNMP Walk
Performing an SNMP walk is a way to query a device for information on all the SNMP objects it supports. This step is crucial to ensure your target device is correctly reporting data.
-
On the iReasoning MIB browser, after entering the target device IP address, select the “SNMP Walk” Operation and.
-
Click “Go”. This action will prompt the MIB Browser to query the target device for all the SNMP objects it has.
-
The browser will then populate a table with values directly from your target device. These values are the current readings and statuses from your target device, which are essential for monitoring and troubleshooting.
Step 6: Verify results
Once you have the SNMP walk results, it's essential to verify them against expected values for your specific device. This ensures that your target device is functioning correctly and that the SNMP walk has been successful.
See a list of supported devices here: Wireless Network Connector | Supported Devices
-
Go to supported device list
-
Refer to the “Configuration Instructions” column. Select the link that has the WNC configuration instructions for your target device.
-
Go to the “Readings Reported” section to find a list of WNC supported OIDs.
-
Search the SNMP walk results for all supported OIDs.
-
Compare the OIDs and their corresponding values from the SNMP walk results with the expected OIDs and values listed for your device.
This comparison helps ensure that your target device is reporting data correctly and that the SNMP walk has captured the necessary information.
Step 7: Restore Original Network Configuration
-
Disconnect the Windows PC from the target device.
-
Using the original network configuration noted from step 3, restore your network configuration to it’s previous settings.
Troubleshooting
Firewall blocking communications
Ensure you do not have any firewalls that may interfere with the target device Communication.
See: Turning Windows Firewall "off"
Connection cant be established
If You are having issues with the connection, some target devices have an “event log” feature which can typically be found on their web console. See the manufacturers instructions of your target device for more details on how to access this feature for further diagnosing network trouble.
Event Logging
Some devices support an event log feature that can help diagnose communication and security issues. Check your devices user manual for this feature.
A typical troubleshooting process using the event logger could look as follows:
-
Connect ethernet between target device and WNC. Power on WNC. Wait 10 minutes for the SNMP device to be scanned.
-
Disconnect ethernet from WNC.
-
Connect ethernet cable to a laptop with its ethernet port set to communicate the to target device.
-
Pull up the target device web console page if applicable.
-
Go to the Event Log and analyze the results.