

These steps explain how to access and validate readings using Packet Power’s Ethernet Gateway
connected to a Windows PC via the EG4 web console. These instructions can and should be
used when no mannaged network connection is accessible.
Prerequisites
-
Laptop or PC running Windows XP or later.
-
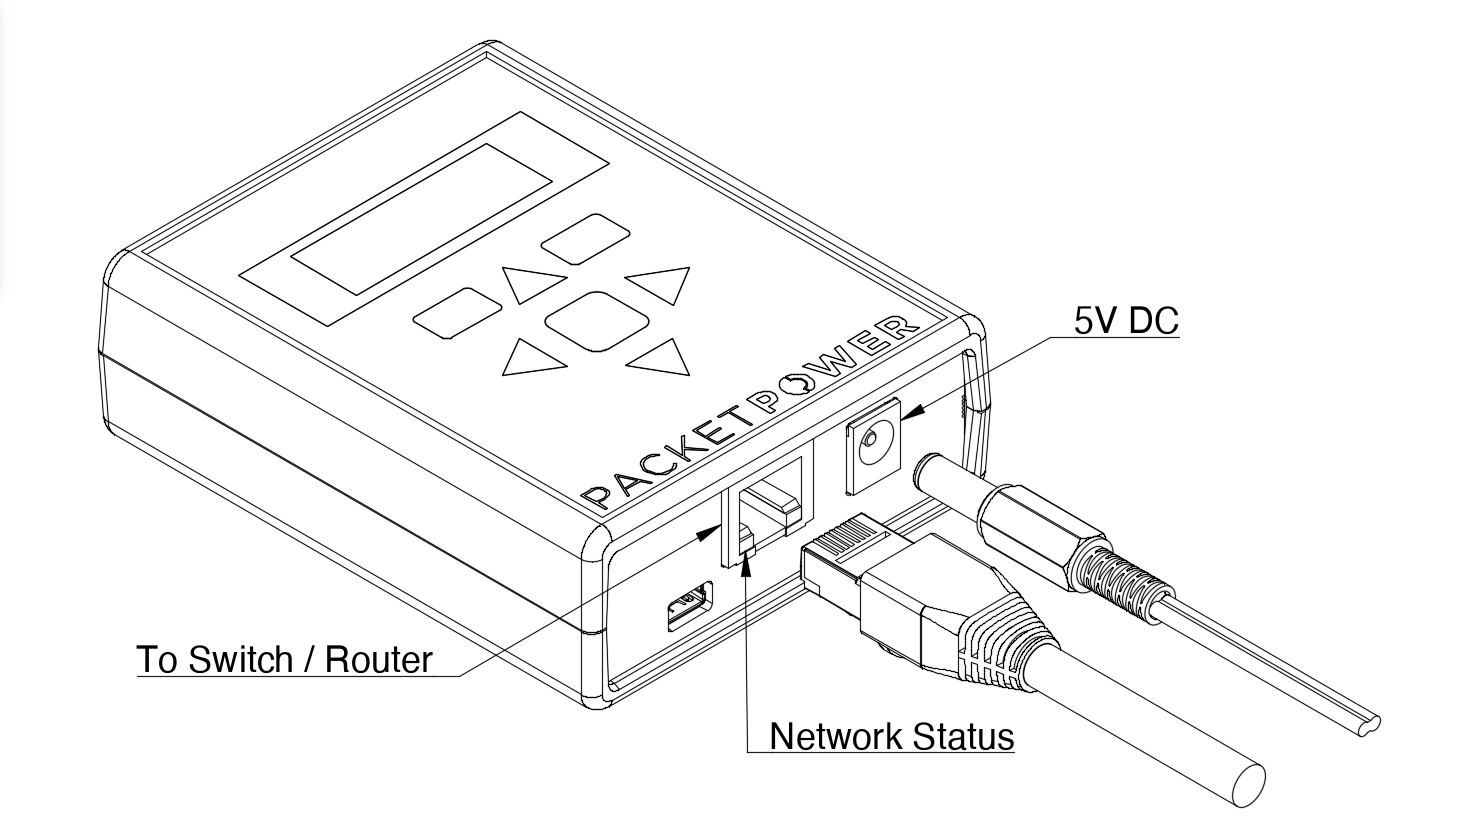
Packet Power Ethernet Gateway with power supply and Ethernet patch cable.
-
If your PC does not have an RJ45 Ethernet port, you can use a USB Ethernet adapter.
-
If 120V power is not readily available, the Ethernet Gateway can also be
Powered via a USB to Mini-USB cable from your PC.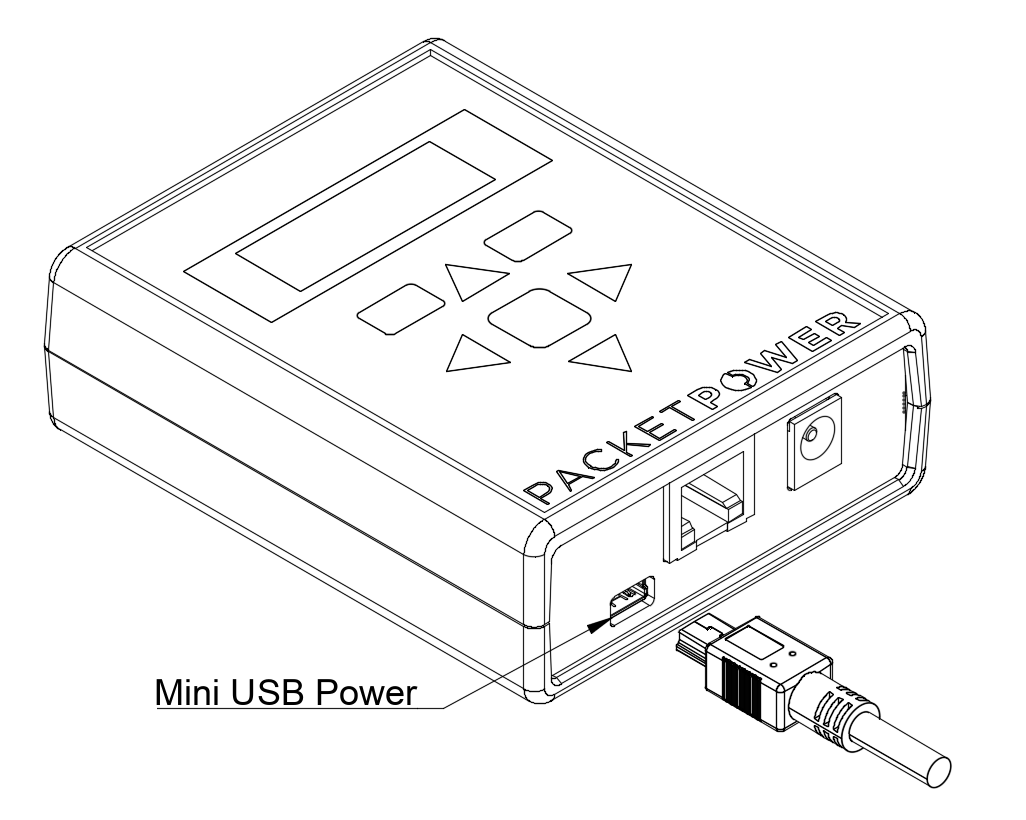
-
-
Close access to monitoring nodes (< 30 meters)
Instructions for accessing Web Console
-
Power on your PC
-
Disconnect the PC from any Internet connection (WiFi or hardwired)
-
Connect the Ethernet cable from the Ethernet Gateway to the PC (or using an adapter)
-
Provide power to the Ethernet Gateway
-
The Ethernet Gateway will go through a boot sequence, which takes ~5-6 minutes
-
Following the boot sequence, the gateway, if configured for DHCP and determines there is no DHCP available, will self-assign an IP address. The self-assigned IP address will look like 169.254.XXX.XXX. Verify the IP on the Gateway display.
-
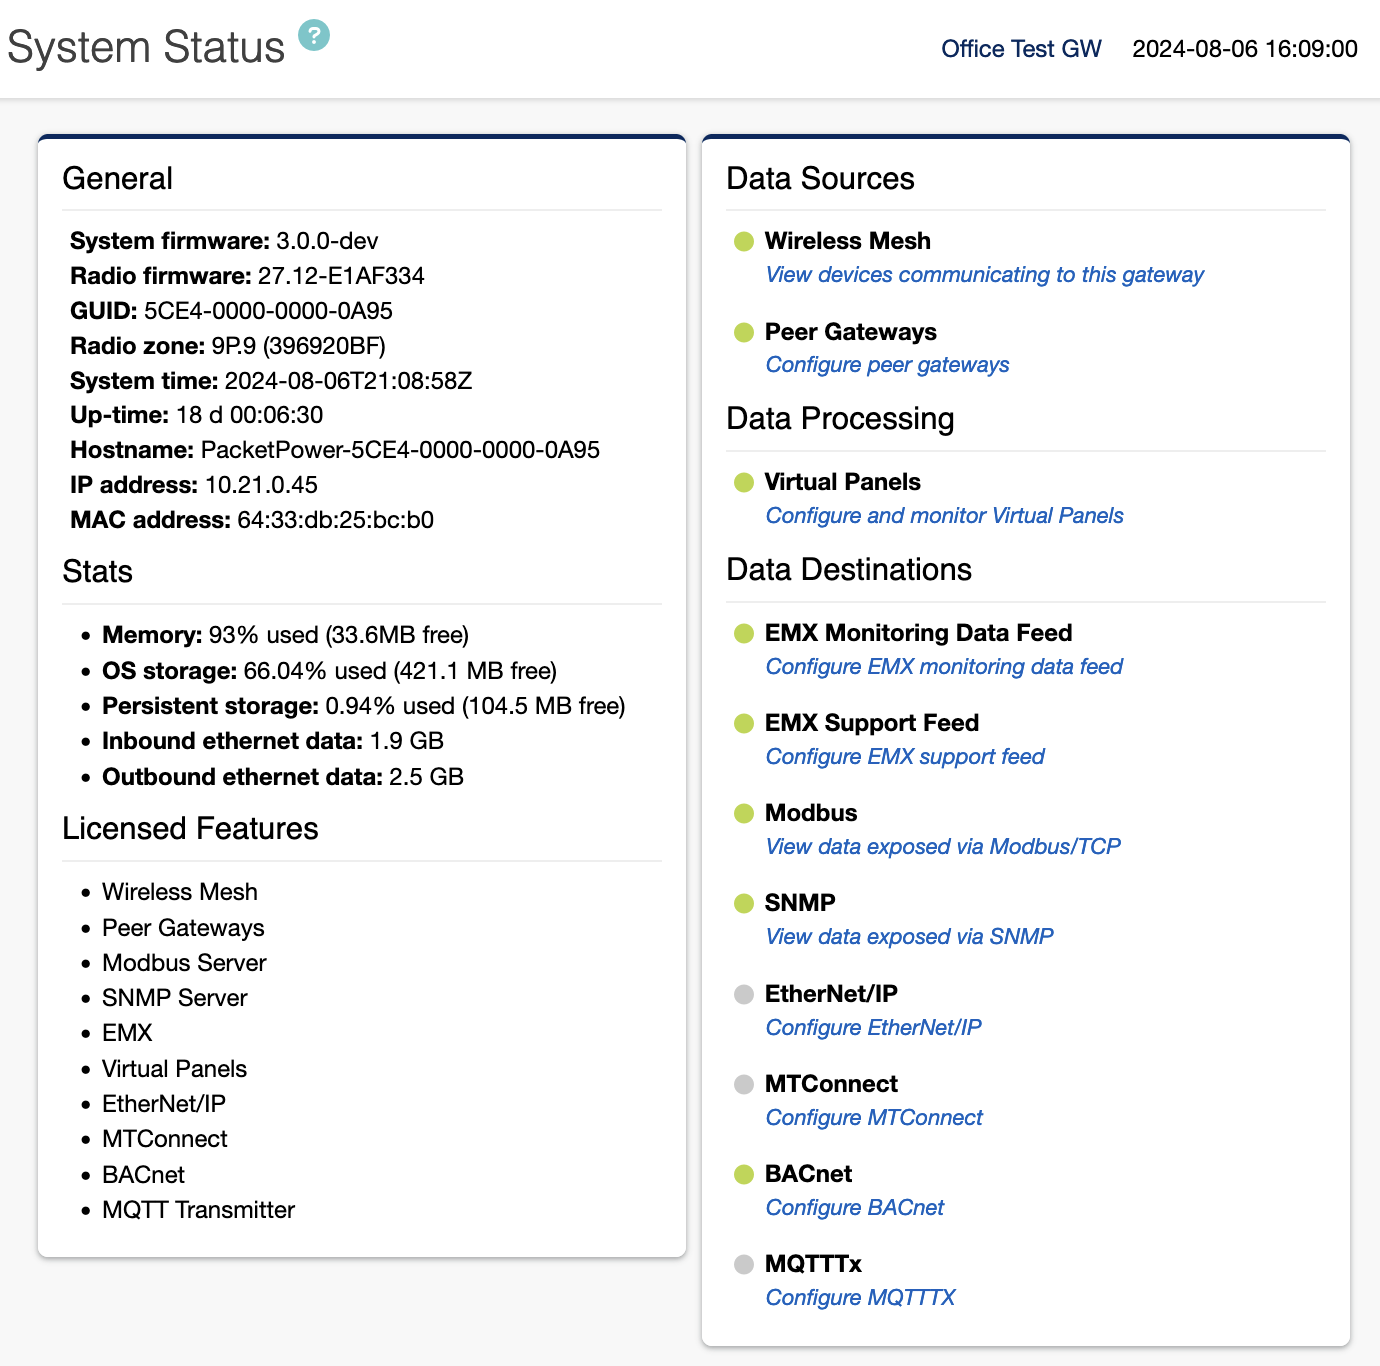
Open a web browser (Chrome, Firefox, etc) and enter the 169.254.XXX.XXX IP into the address bar (this should direct you to the Web Console).
The Gateway Console status screen will appear as shown below.
-
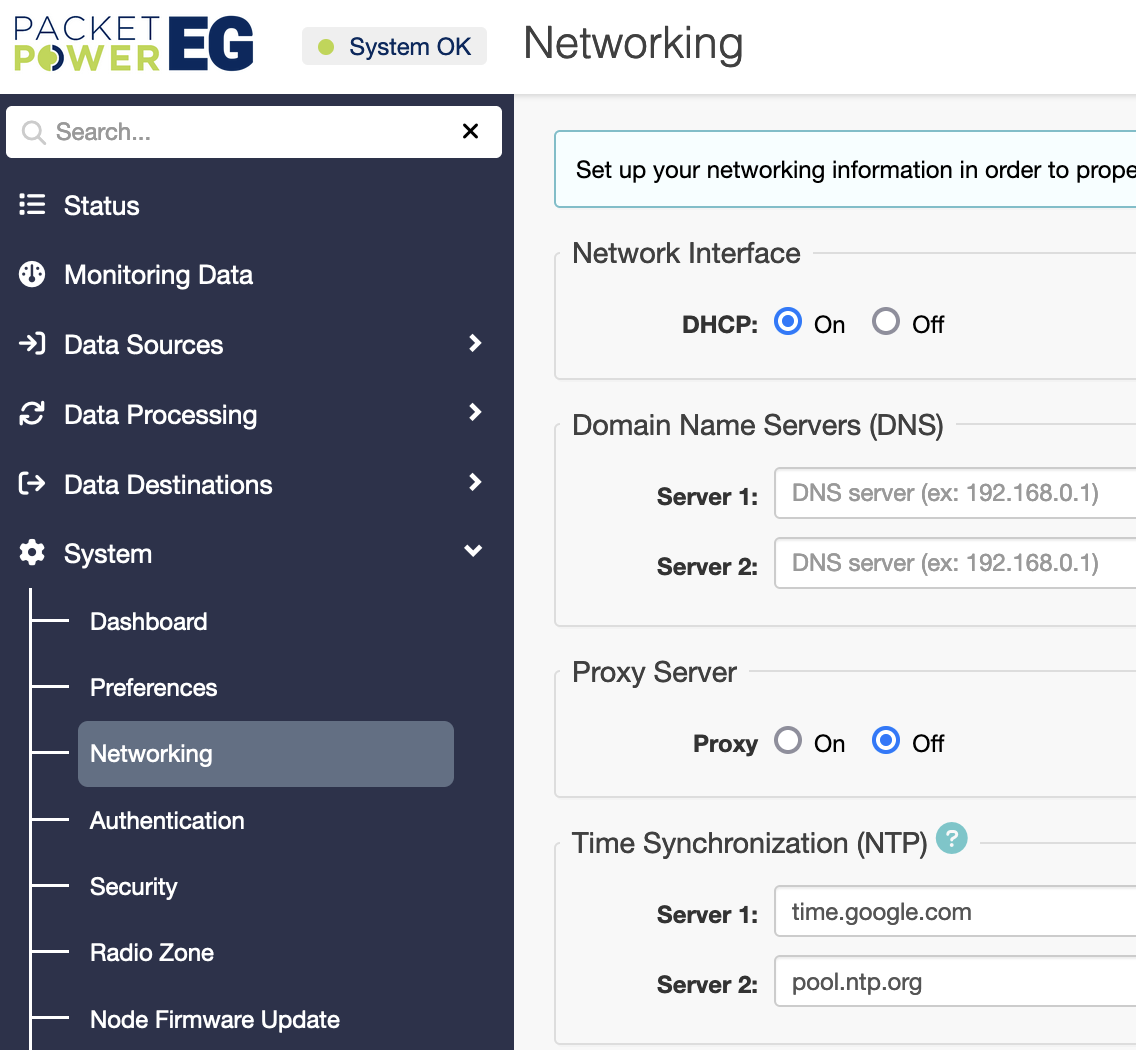
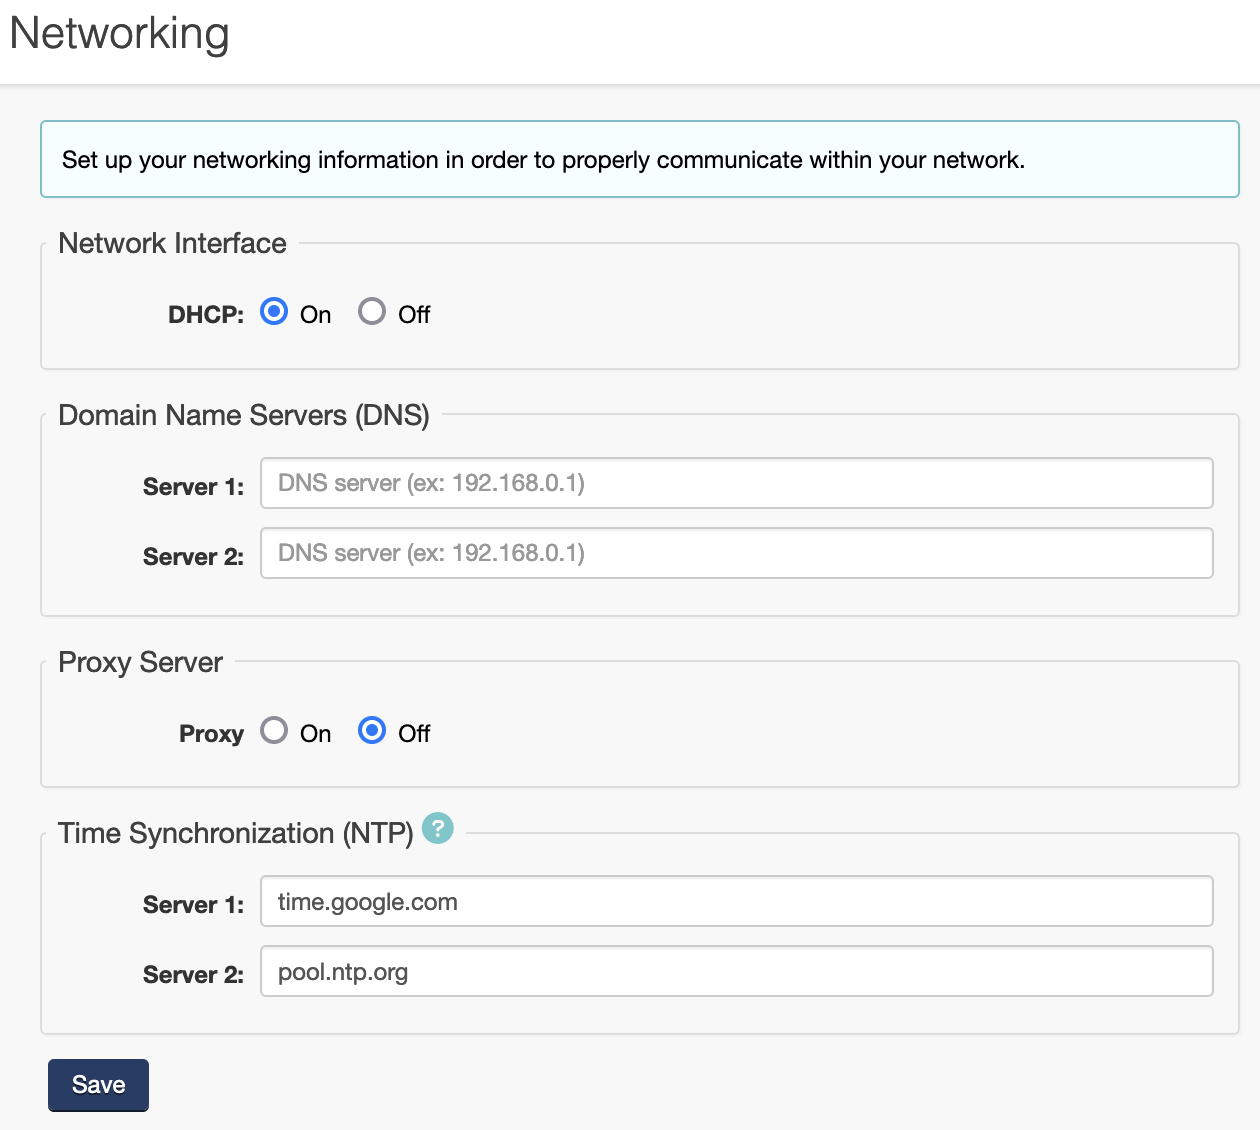
To access the network settings, click System → Networking on the left navigation bar.
-
When DHCP is turned off, the static network settings will be revealed in the Network Interface section.
It is now possible to modify the IP address, Netmask, and Gateway addresses.
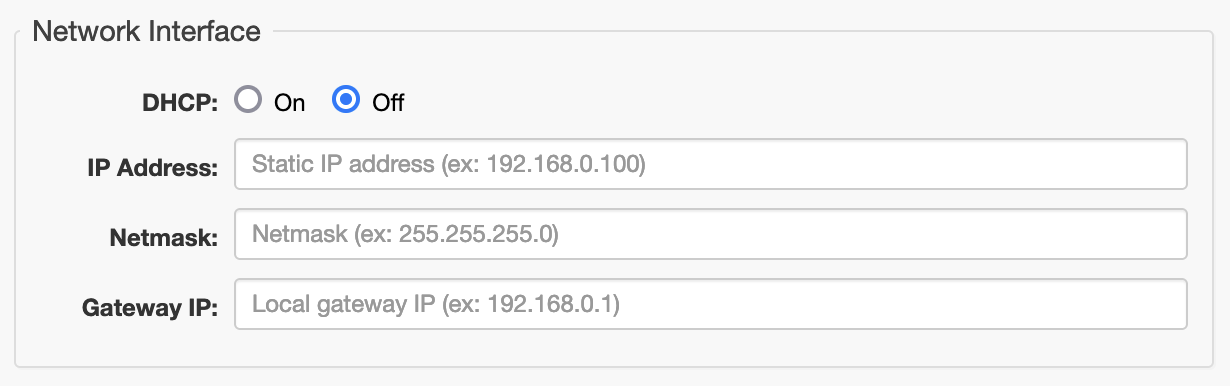
If DHCP is “on” you will not be able to access any of the static network settings until it is switched off under the Network Interface section.
-
If using a static IP, you should also set a DNS (Domain Name Server); input the server address under the Domain Name Server section.
-
For the Gateway to have a proper time reference, a NTP server address is needed in
the Time Synchronization Section. After a time server is entered and saved, confirm the time at the top right of the console.
For more information on available NTP servers, see: Setting an NTP Time Source