

This guide provides a summary of how to make the changes needed to allow the Gateway to work on your Ethernet network. For more detailed instructions see Gateway Configuration or email support@packetpower.com.
1. Setup
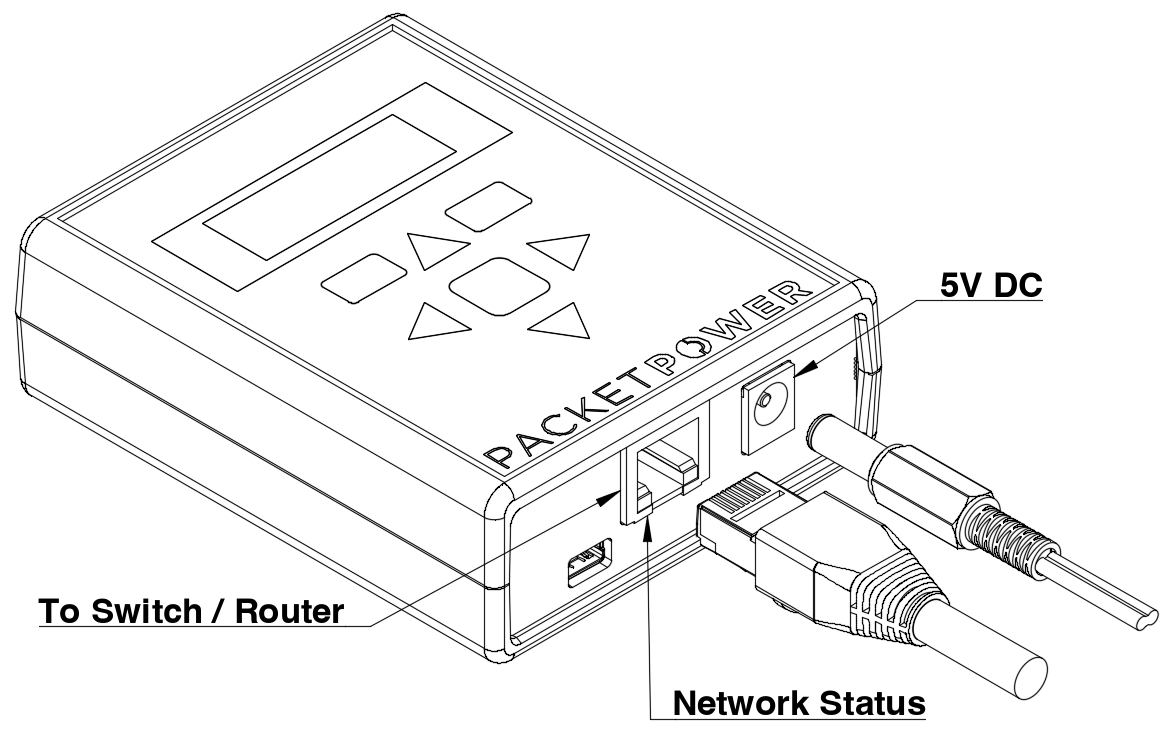
Gateway Must be Connected to a Network to Enable Configuration.
-
Insert Ethernet cable into the network port and connect other end to the network.
-
Connect the universal power supply provided to the 5V DC jack to Power the Gateway.
If either of the Network Status lights are not lit there is no network connection. A network connection must be established before proceeding.
2. Navigation

-
Unlock by tapping MENU three times.
-
lock by tapping EXIT.
The touchpad automatically locks after 10 seconds of inactivity.
3. Accessing DHCP
If you are using DHCP skip to Step 5.

-
Using the touchpad navigate to the DHCP settings menu.
-
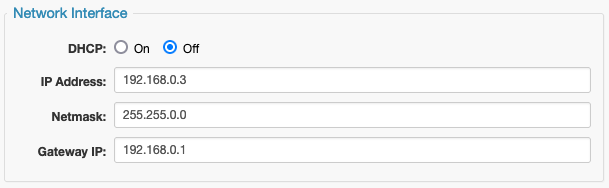
Select DHCP ON (default) or OFF if using a static IP address.
4. Setting IP Address
If using a static IP instead of DHCP follow these steps. See here for additional instructions on setting your gateway IP from a windows PC.
-
Once DHCP is turned off, enter the IP, Netmask, and Gateway address.
-
A temporary IP address can be assigned and modified once you have access to the Gateway.

See: Setting Gateway IP from a Windows PC for additional instructions on setting the IP from a Windows PC.
5. Access Gateway Console

-
Access the gateway Console by entering the Gateway’s IP address onto a web browser.
Make sure the Gateway and browser are both connected to an accessible switch or router.
-
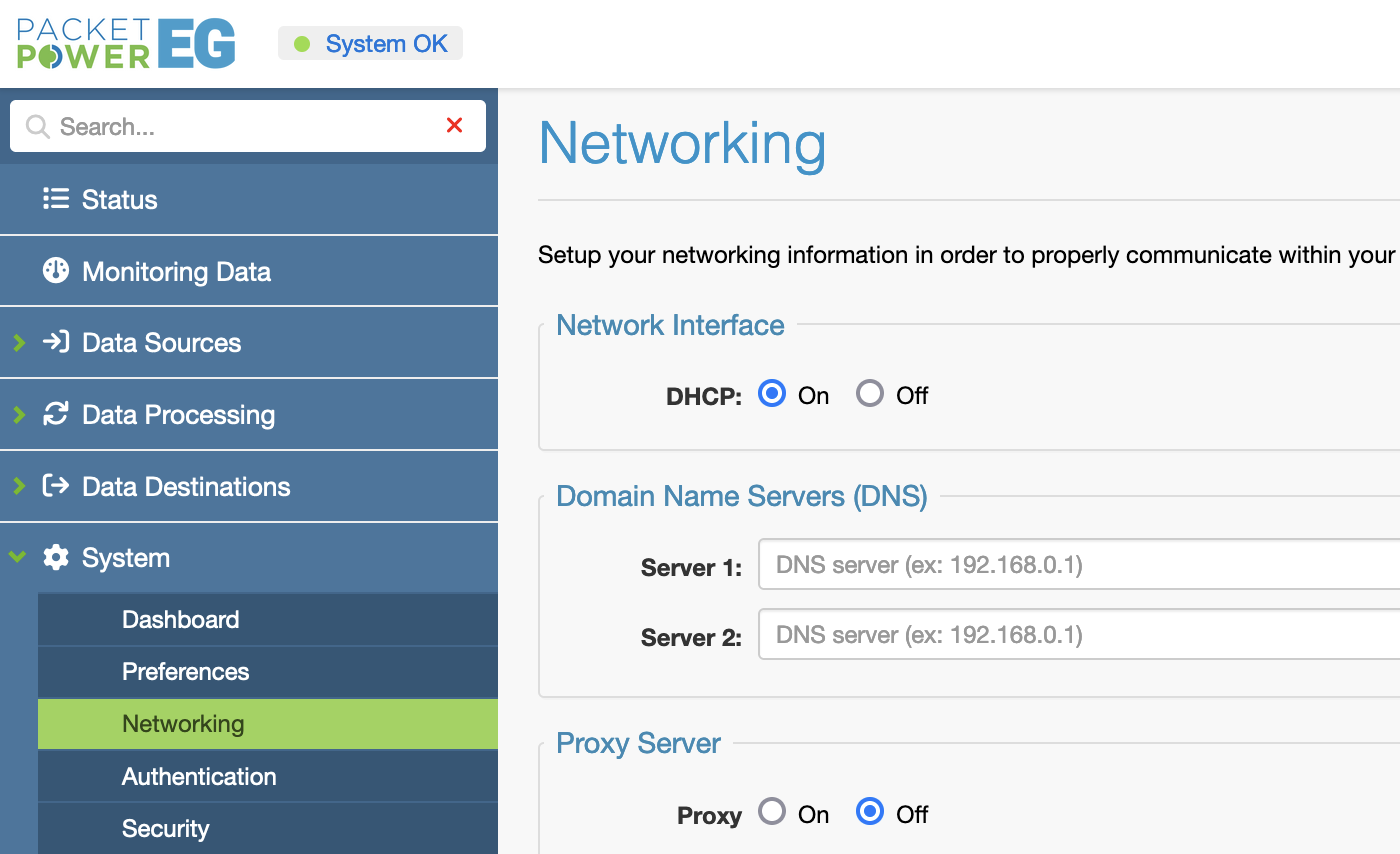
From the left hand Menu select “System” and then the “Networking” tab.
6. Network Settings
-
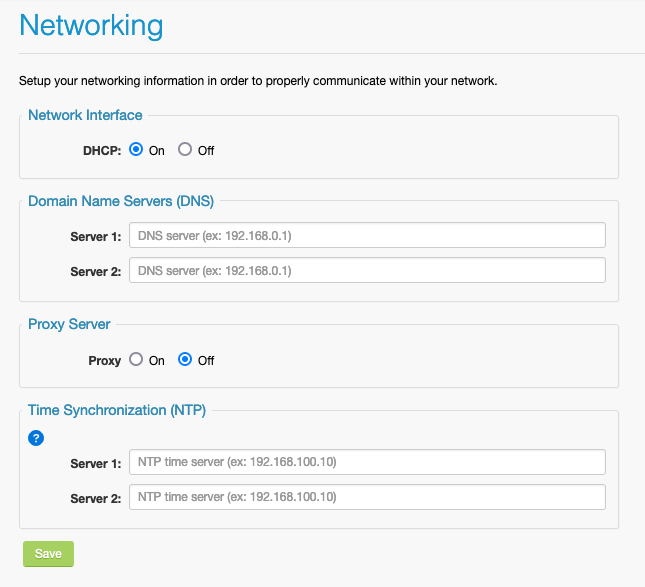
Enter the DNS address(s).
-
Select a proxy server if applicable (often used when using EMX portal).
-
Note that static IP addresses can also be modified here if DHCP is turned off.
-
Click “save” icon to input settings.
Time Synchronization
-
Enter an NTP time server IP address or domain name
-
Available servers can be found at http://www.pool.ntp.org
-
Default time servers are 0.pool.ntp.org and http://1.pool.ntp.org
-
Click “save” icon to input settings.
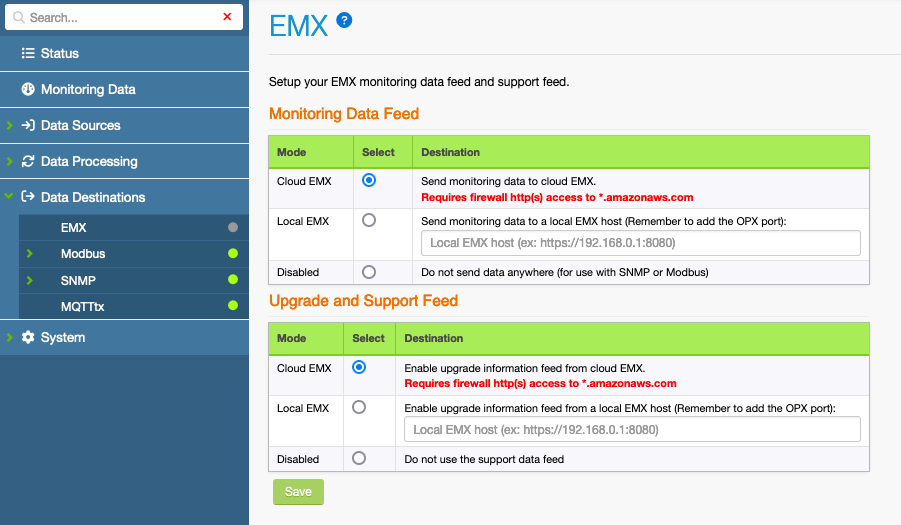
7. Choose your Data Destination
-
Click on “Data Destinations” on the left hand menu.
-
Select how you want to receive your data: EMX, Modbus, SNMP, or MQTT. EMX feeds can be delivered simultaneously with Modbus, SNMP, or MQTT feeds.
-
For SNMP, Modbus, or MQTT output, ensure the Gateway is licensed correctly as indicated by a green light next the the Modbus, SNMP, or MQTT tab under Data Destinations.
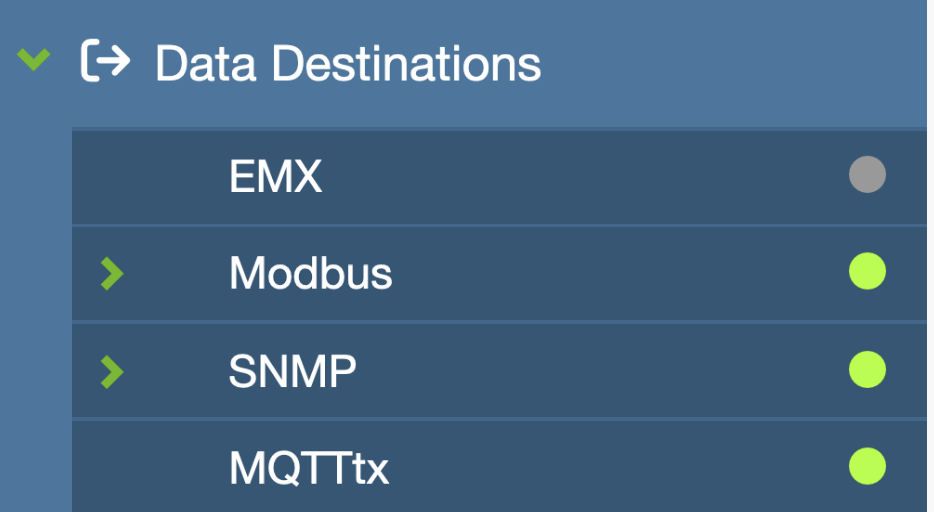
Contact Packet Power if the SNMP, Modbus, or MQTT feed needs to be enabled.
-
For more detailed support on SNMP, Modbus, or MQTT see Supported Protocols or go to http://www.packetpower.com/support .
-
Select the desired EMX implementation type (cloud is default) for both “Monitoring Data Feed” and “Upgrade and Support Data Feed” sections.
Ensure that the Gateway IP address has outbound access to port 443 (HTTPS) for *.amazonaws.com when using cloud EMX.
-
For Local EMX, enter the IP address of the server using port 8080. (e.g. xxx.xxx.xxx.xxx:8080)
-
Before you can access your data via EMX make sure your Packet Power representative has set up an EMX account. See EMX Monitoring Portal or visit http://packetpower.com/support for more details.
ONLINE: http://packetpower.com/support
EMAIL: support@packetpower.com
PHONE: +1 877-560-8770