

The following are step-by-step instructions for implementing SNMP using the Wireless Gateway Version 4 (EG4). These instructions are intended for SNMP versions 1 and 2. The Version 4 Gateway does support version 3 SNMP. For details on version 3 implementation please contact support@packetpower.com.
Data Output from SNMP Gateways
.svg?cb=e6a8eababf5a68af09cceab52f0ae53a)
Packet Power Gateways collect data from Packet Power wireless monitoring nodes and aggregate the data for transmission by SNMP, Modbus TCP/IP and directly to the Packet Power EMX monitoring portal. Note that the Gateway can support transmission of data via either SNMP or Modbus TCP/IP while simultaneously serving data to the EMX portal.
Required Files and Tools for SNMP
MIB Files
-
MIB files can be downloaded directly on the Gateway.
See: SNMP for Wireless Gateways | Downloading the Standard MIB File
A MIB File Browser
-
We recommend iREasoning MIB Browser, an easy to use utility that allows you to view MIB files.
See: Using the iReasoning MIB Browser
Configured EG4 Gateway
-
The Gateway is configured and communicating with the wireless nodes.
-
The Gateway has a license for SNMP.
See: Console - System
Accessing the Gateway Console
Make sure your Gateway is configured with an IP address and accessible on your network. The Gateway must be connected to a switch /router on an accessible network.
It may not be accessible directly through a PC Ethernet to Gateway connection. For Gateway network configuration instructions follow this link.
-
Enter the IP address of the Gateway on any browser to access the Gateway Console
-
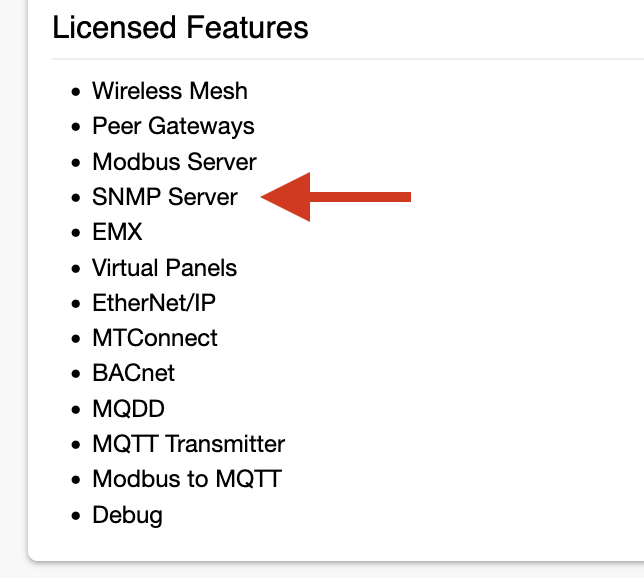
Make sure SNMP is listed as a licensed feature under Status → Licensed Features. If not see the licensing section on how to add a license
-
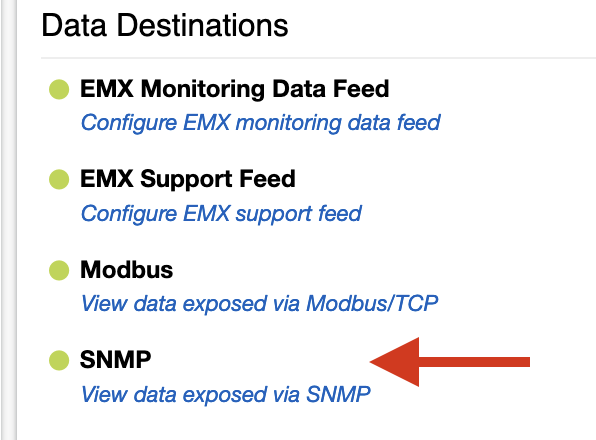
Make sure that the system is communicating properly with the monitoring nodes as indicated by a green status light under Status → Data Destinations.
-
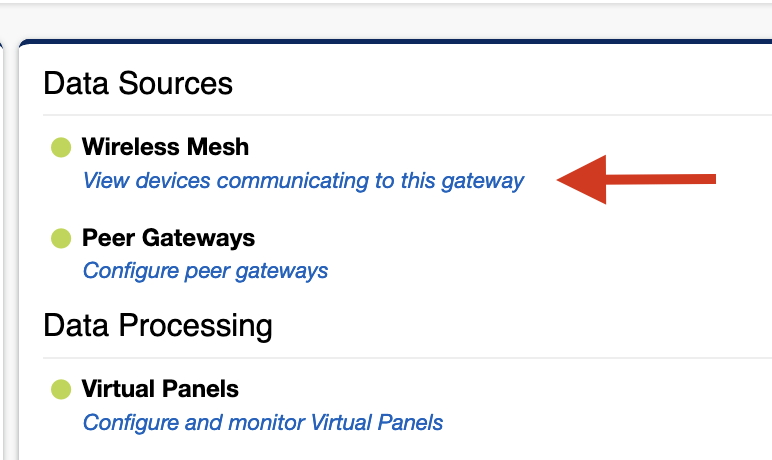
Click the link under Status → Data Sources → Wireless Mesh to see monitoring nodes that are currently communicating with the Gateway .
-
SNMP Data will be able to be viewed through the SNMP data link; this light will be green once the SNMP agent is enabled.

Accessing the MIB files from Gateway Console
MIB files can be downloaded directly from the Gateway Console. There are two MIB files. The standard EG4 file is for use in standard SNMP applications. The VIP MIB file is used when using Virtual IP addresses for each monitoring node instead of the standard 16 digit GUID embedded in the OID.
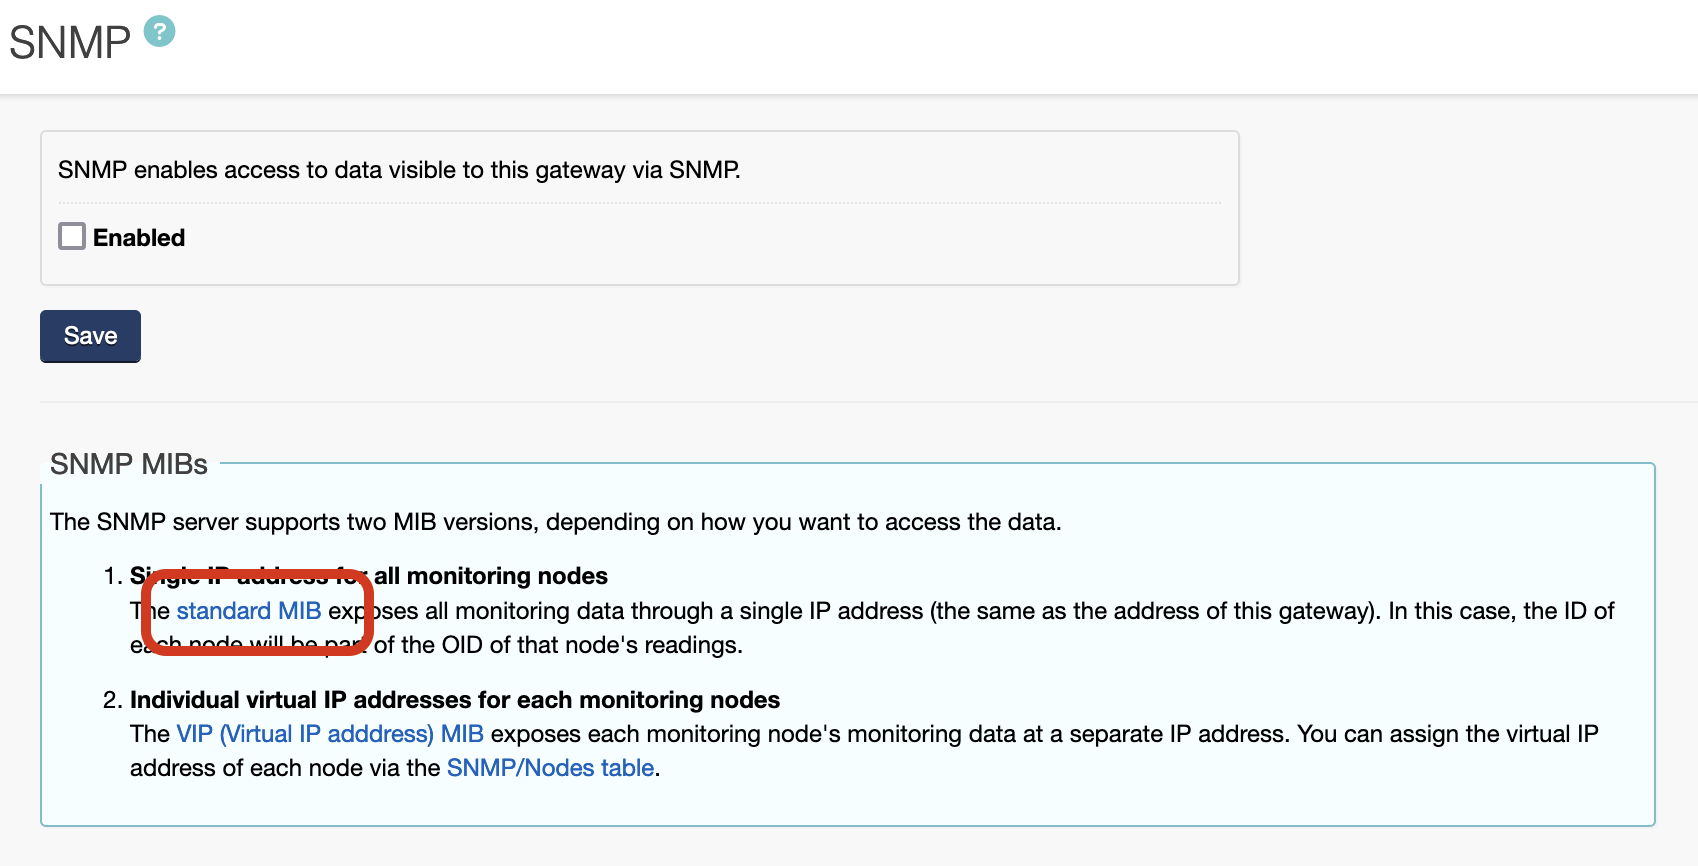
Downloading the Standard MIB File
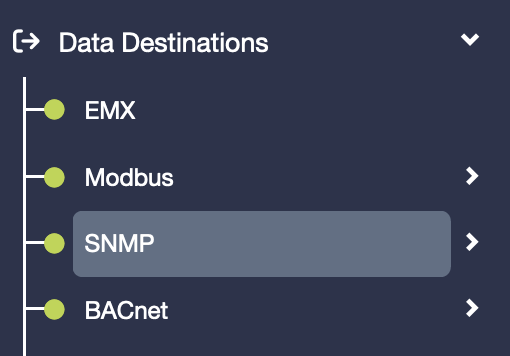
On the Gateway console go to Data Destinations → SNMP on the left menu and then click on the standard MIB file.
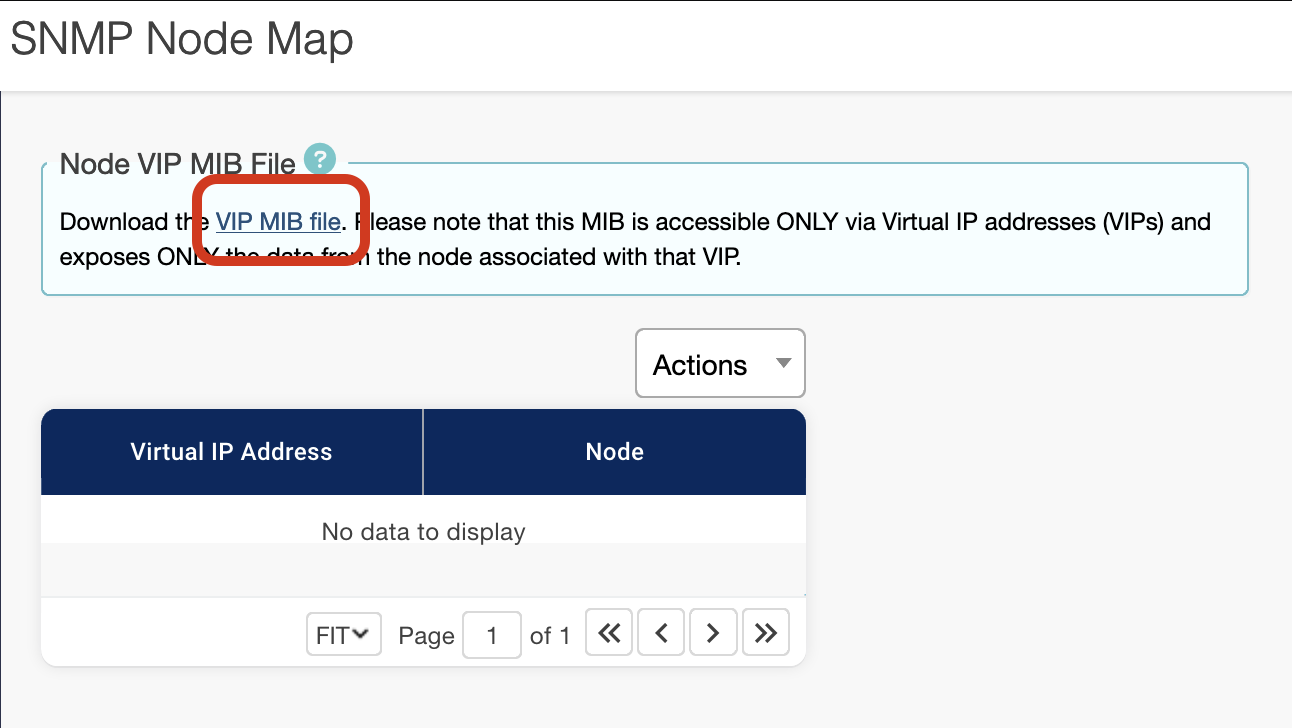
Downloading the MIB File for Use With Virtual IP Addressing
On the Gateway console go to Data Destinations → SNMP → Nodes on the left menu.
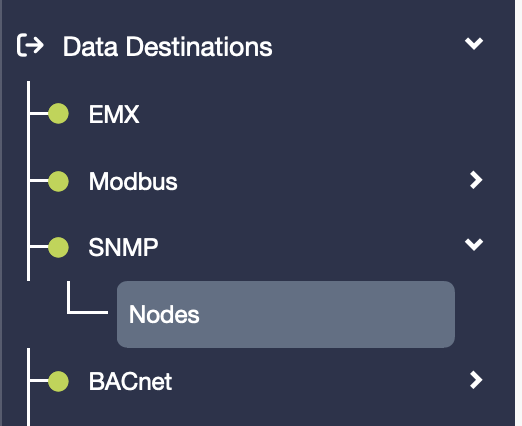
Then click the link to download the VIP MIB file.
Viewing monitoring node readings on the Gateway Console
-
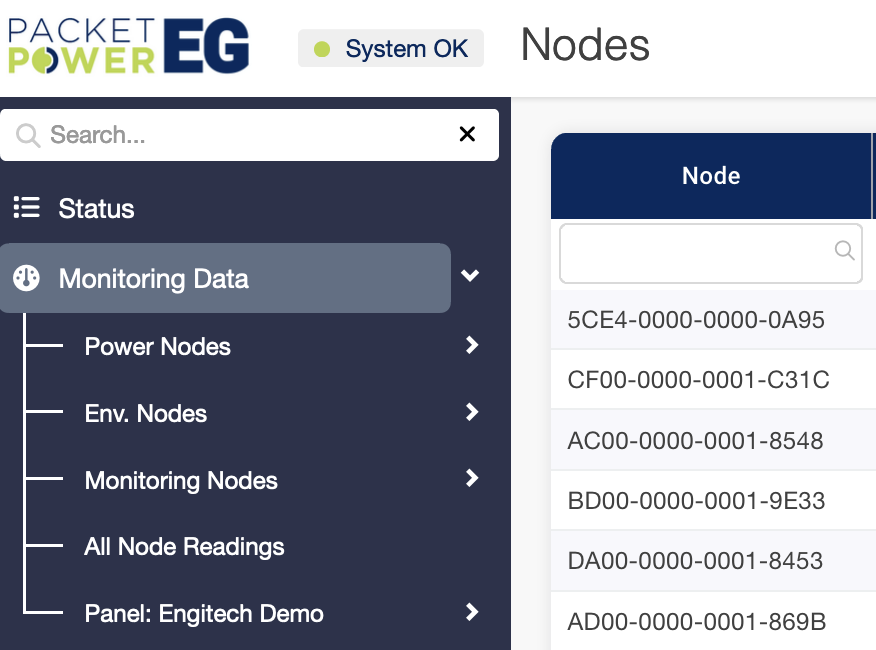
Confirm that monitoring nodes are active and returning data to the Gateway by selecting the Monitoring Data tab; this will display all connected nodes.
-
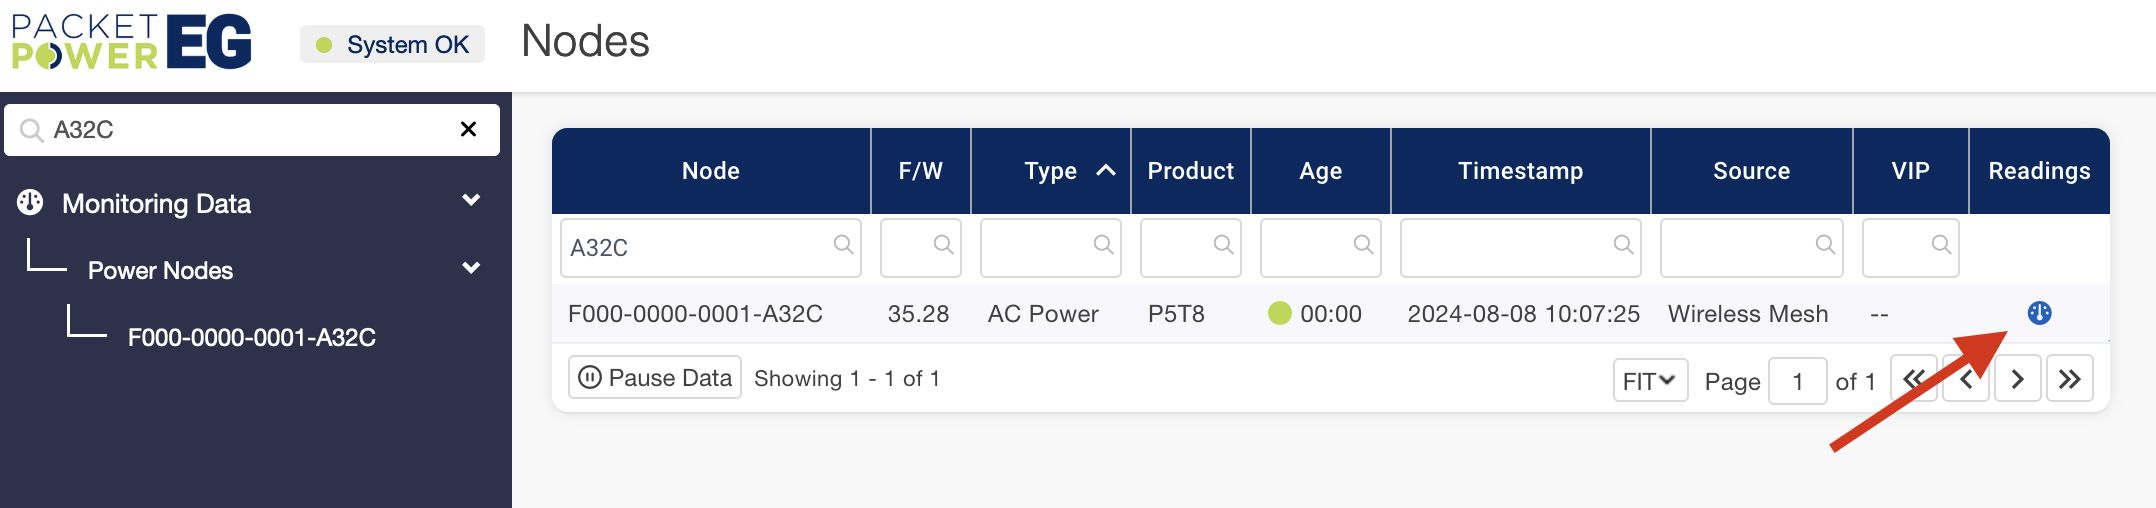
Click on the “readings” icon to expose the real time readings for a specific monitoring node
Uploading an SNMP license to the Gateway
-
To activate a product license, select the license file with the browse button under System → License.
-
Click on the Upload button and point to the location of the license provided by Packet Power
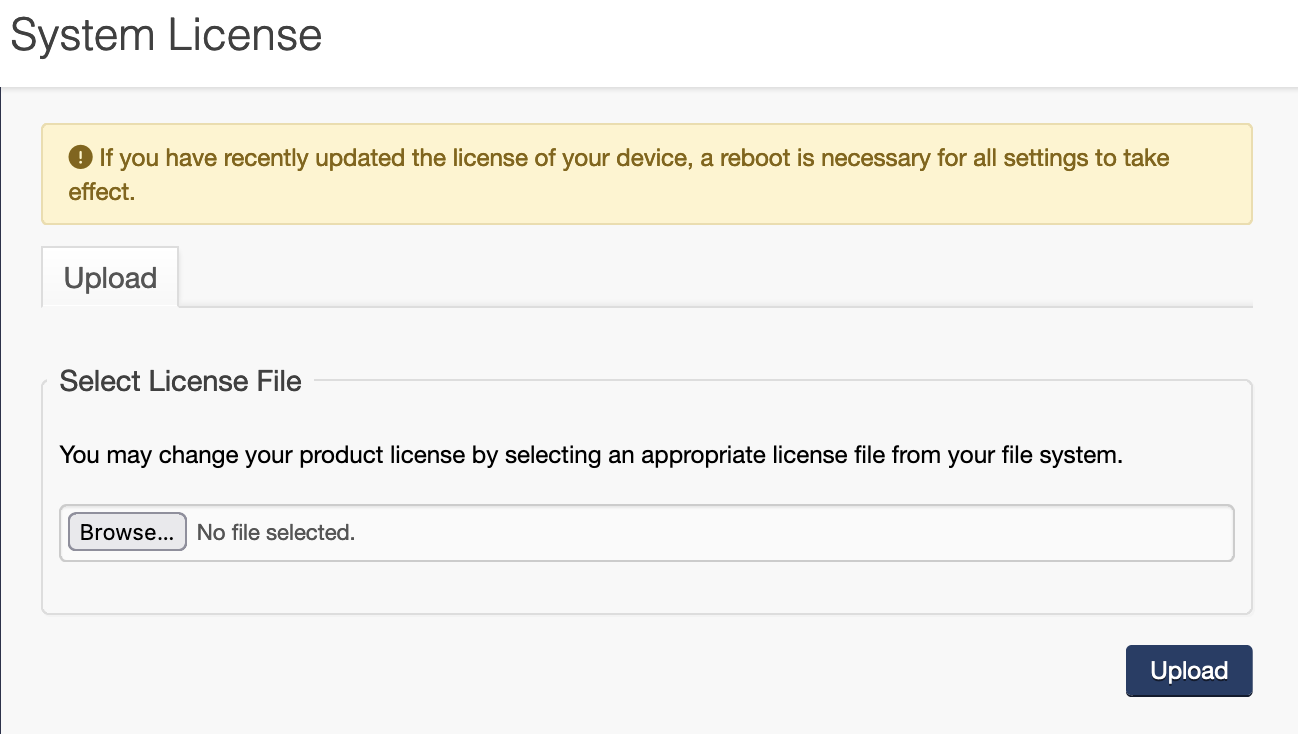
A reboot of the device will be required to make the license effective. The reboot option can be found under System → Reboot.
In the event that SNMP is not a licensed feature you will need to obtain a license from Packet Power support@packetpower.com.
Enabling and configuring the SNMP Agent
-
Navigate to Data Destinations → SNMP on the left navigation bar.
-
Make sure SNMP is enabled in the check box
-
Select the correct SNMP version. This guide is for SNMP V1 and V2; for SNMP V3 implementation see the SNMP 3 guide
-
Set the Agent port to 161 or as needed
-
The Community read string (used for authentication) should be “public”
-
Click “Save” to save settings
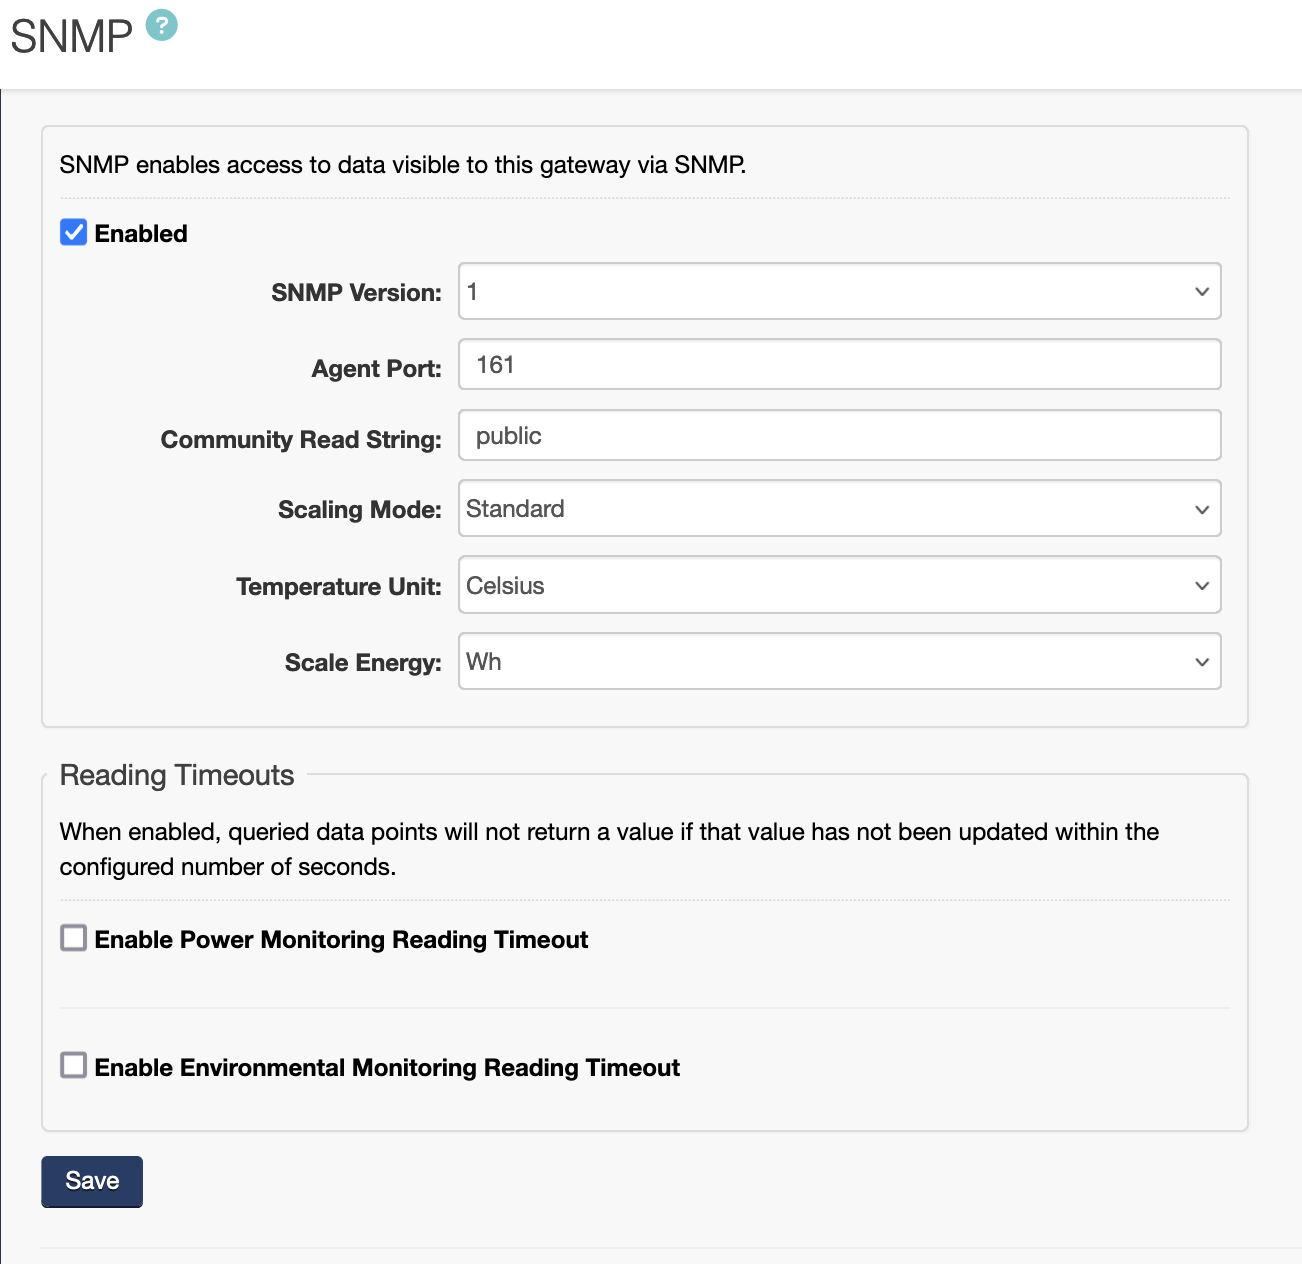
The SNMP status light in the left menu will be green indicating the onboard SNMP agent is active
For documentation on how to use the iReasoning MIB Browser Tool see Using the iReasoning MIB Browser