

Go here for the EG4 Quickstart Guide: Wireless Gateway Easy Start Guide
Configuring Network Settings
The Gateway requires an IP address prior to being network accessible unless it is being used in DHCP mode.
Before setting the IP address make sure that you have the following data provided to you by your IT administrator.
1) IP Address
2) Gateway
3) Netmask
4) DNS
Navigating the Gateway
If the Gateway is new and does not have an IP address you can enter the IP address directly onto the Gateway using the touch sensitive surface and display.
After the Gateway is energized and completes its boot sequence (approximately 30-60 seconds), the Network Status menu will appear. This will reveal details about the Gateway's version, IP address (if previously programmed), MAC address, and Uptime (duration since last energization).
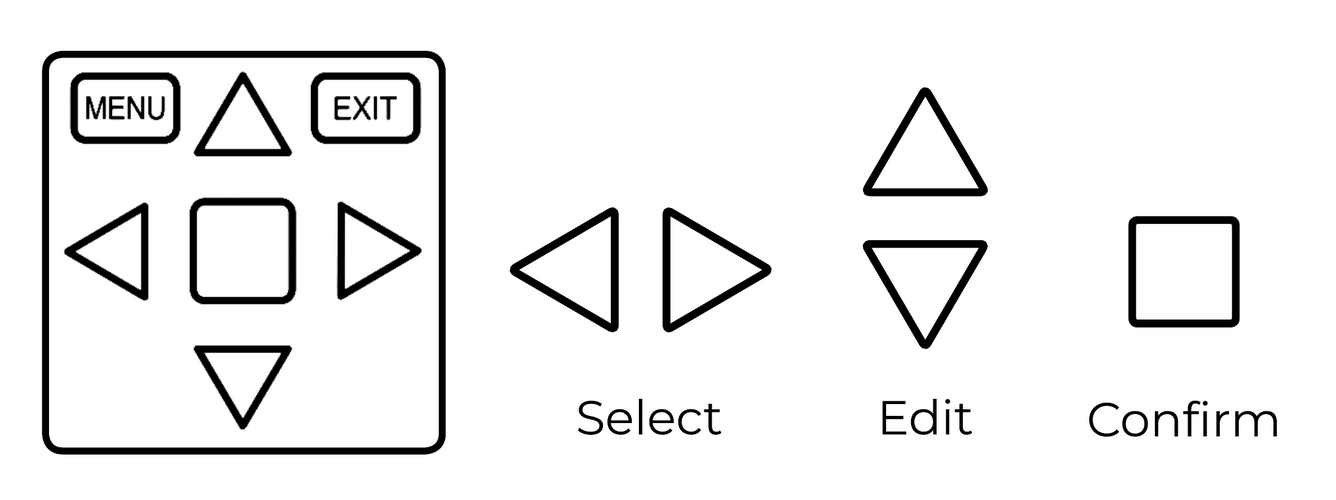
Unlock the touchpad by tapping MENU three times.
Navigate the menu by tapping an arrow on the touchpad in the appropriate direction.
Save a selection by tapping the center square.
Lock the touchpad by tapping EXIT.
Note: The touchpad automatically locks after 10 seconds of inactivity.
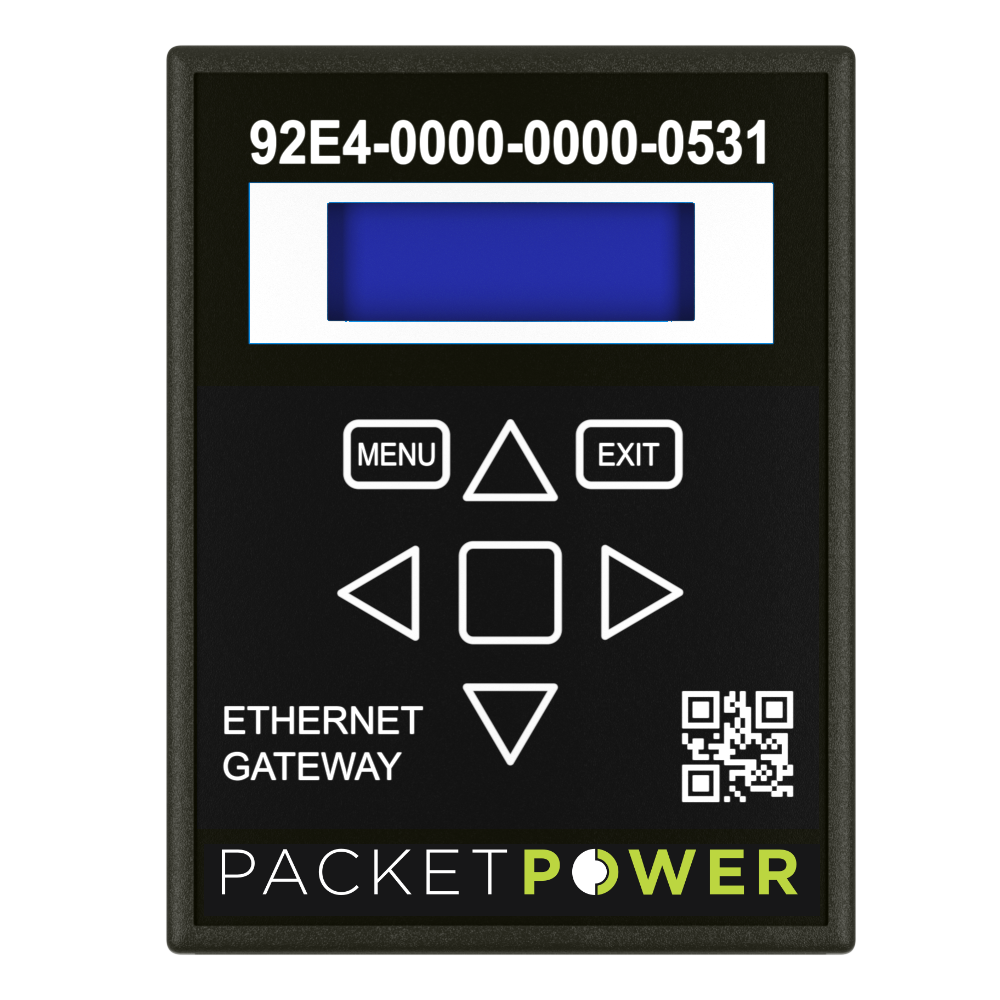
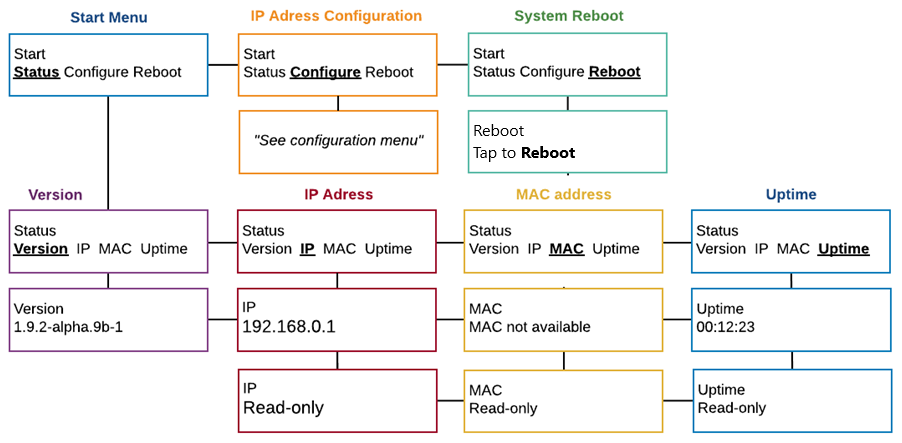
Gateway LCD Menu
The network status menu will display any configured network parameters.
Version: Gateway's firmware version
IP Address: Programmed IP address
MAC Address: Applicable MAC address
System Reboot: Reboots the Gateway
Uptime: Total time since the Gateway was last energized
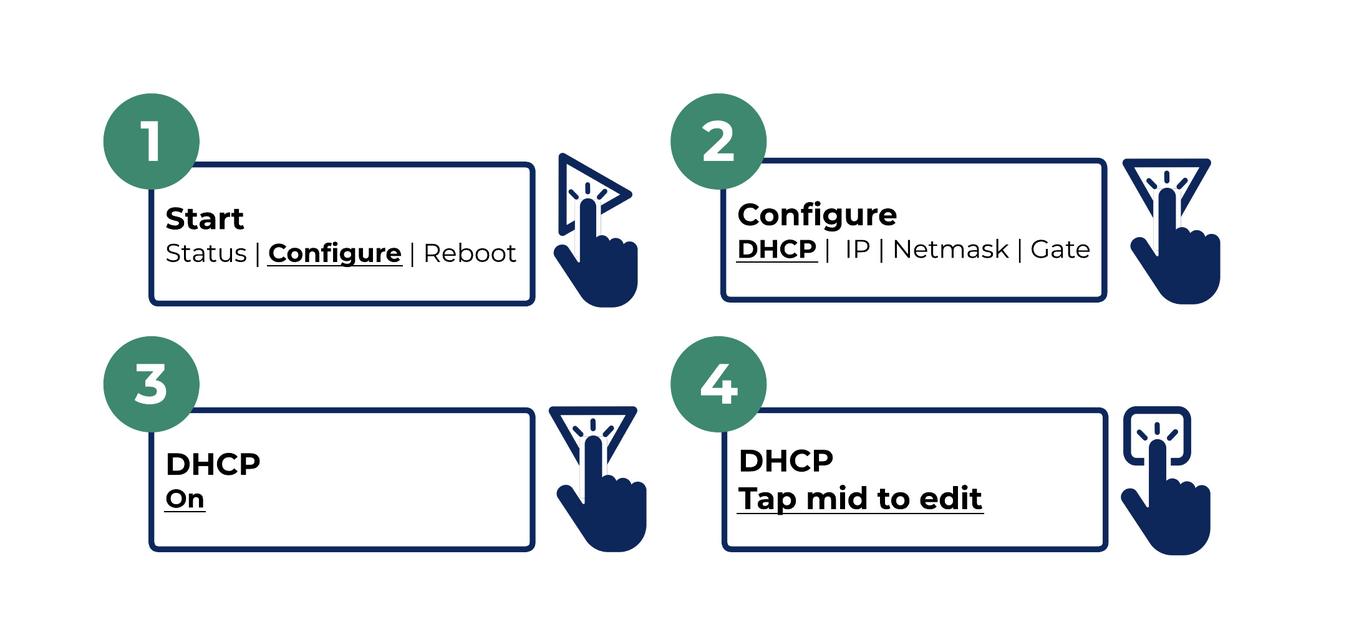
Turning DHCP On/Off Using the Local LCD Menu
The Gateway is provided with DHCP "on" as a default.
DHCP addressing relies on the server to automatically assign the IP information eliminating the need to manually input the IP addressing.
To enable manual IP addressing, as required in most cases, it is necessary to turn DHCP off by following the menu instructions below.
When DHCP is turned off, the configuration menu will reveal options for inputting IP address information.
Entering IP Address Data Using the Local LCD Menu
With DHCP turned off the Configure menu will reveal options for setting the IP address, Netmask and Gateway.
All of these parameters need to be filled in before the Gateway can be operational.
If you do not have this information it can be provided to you by your network administrator.

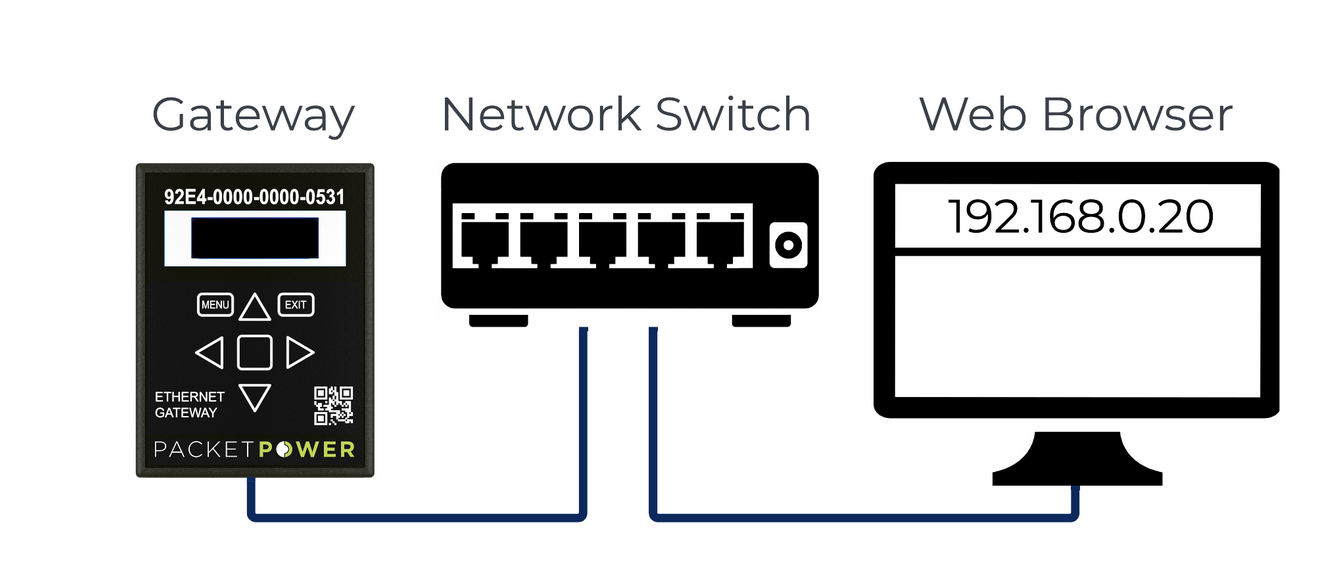
Accessing the Gateway Web Console Using a Browser
Once an IP address is assigned to the Gateway either manually or via DHCP, you can access the Gateway console using a standard web browser and entering the IP address of the Gateway.
This requires that the Gateway be connected via Ethernet network router or switch. Under some circumstances the Gateway can be accessed and configured directly from a PC but many enterprise systems prevent external IP addressing functions on a PC.
The Gateway console is described in greater detail on the Ethernet Gateway Console page.
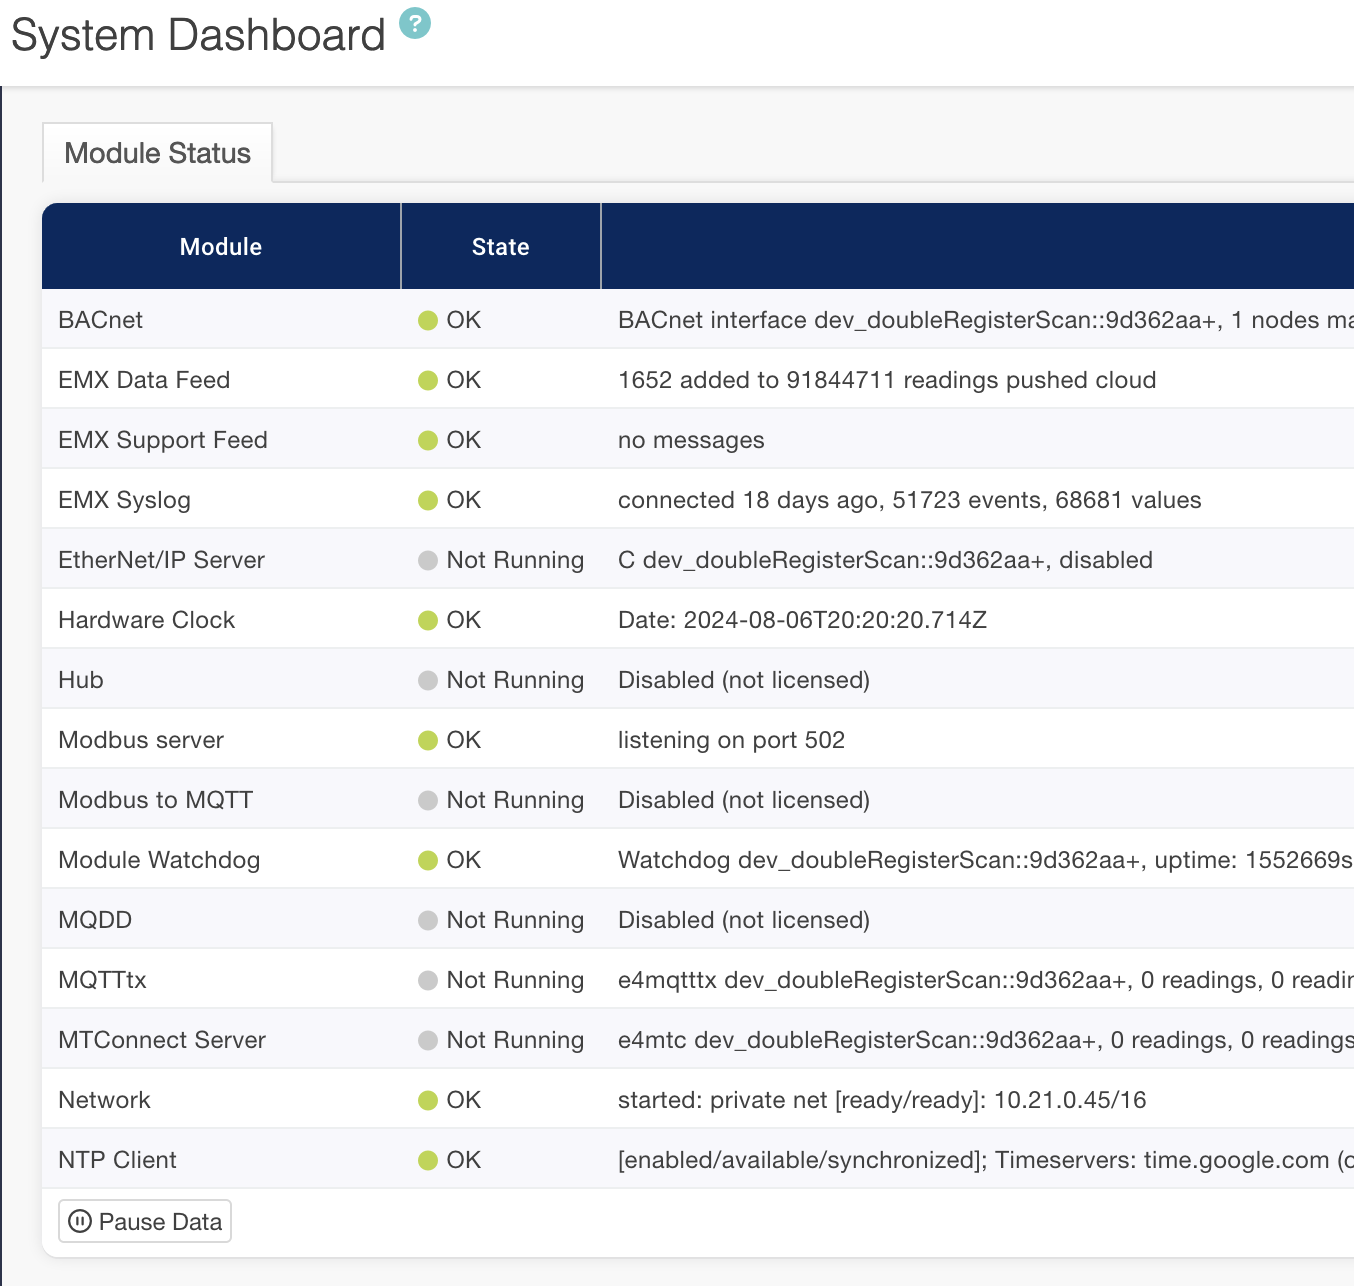
The Gateway Console status screen will appear as shown below under the “System” Tab.
Navigate to System → Networking To access the network settings tab.
If DHCP is “on” you will not be able to access any network setting until it is switched off under the Network Interface section.
When DHCP is turned off the network settings will be revealed in the Network Interface section.
It is now possible to modify the IP address, Netmask, Gateway addresses.
If using DNS (Domain Name Servers), input the server address under the Domain Name Server section.
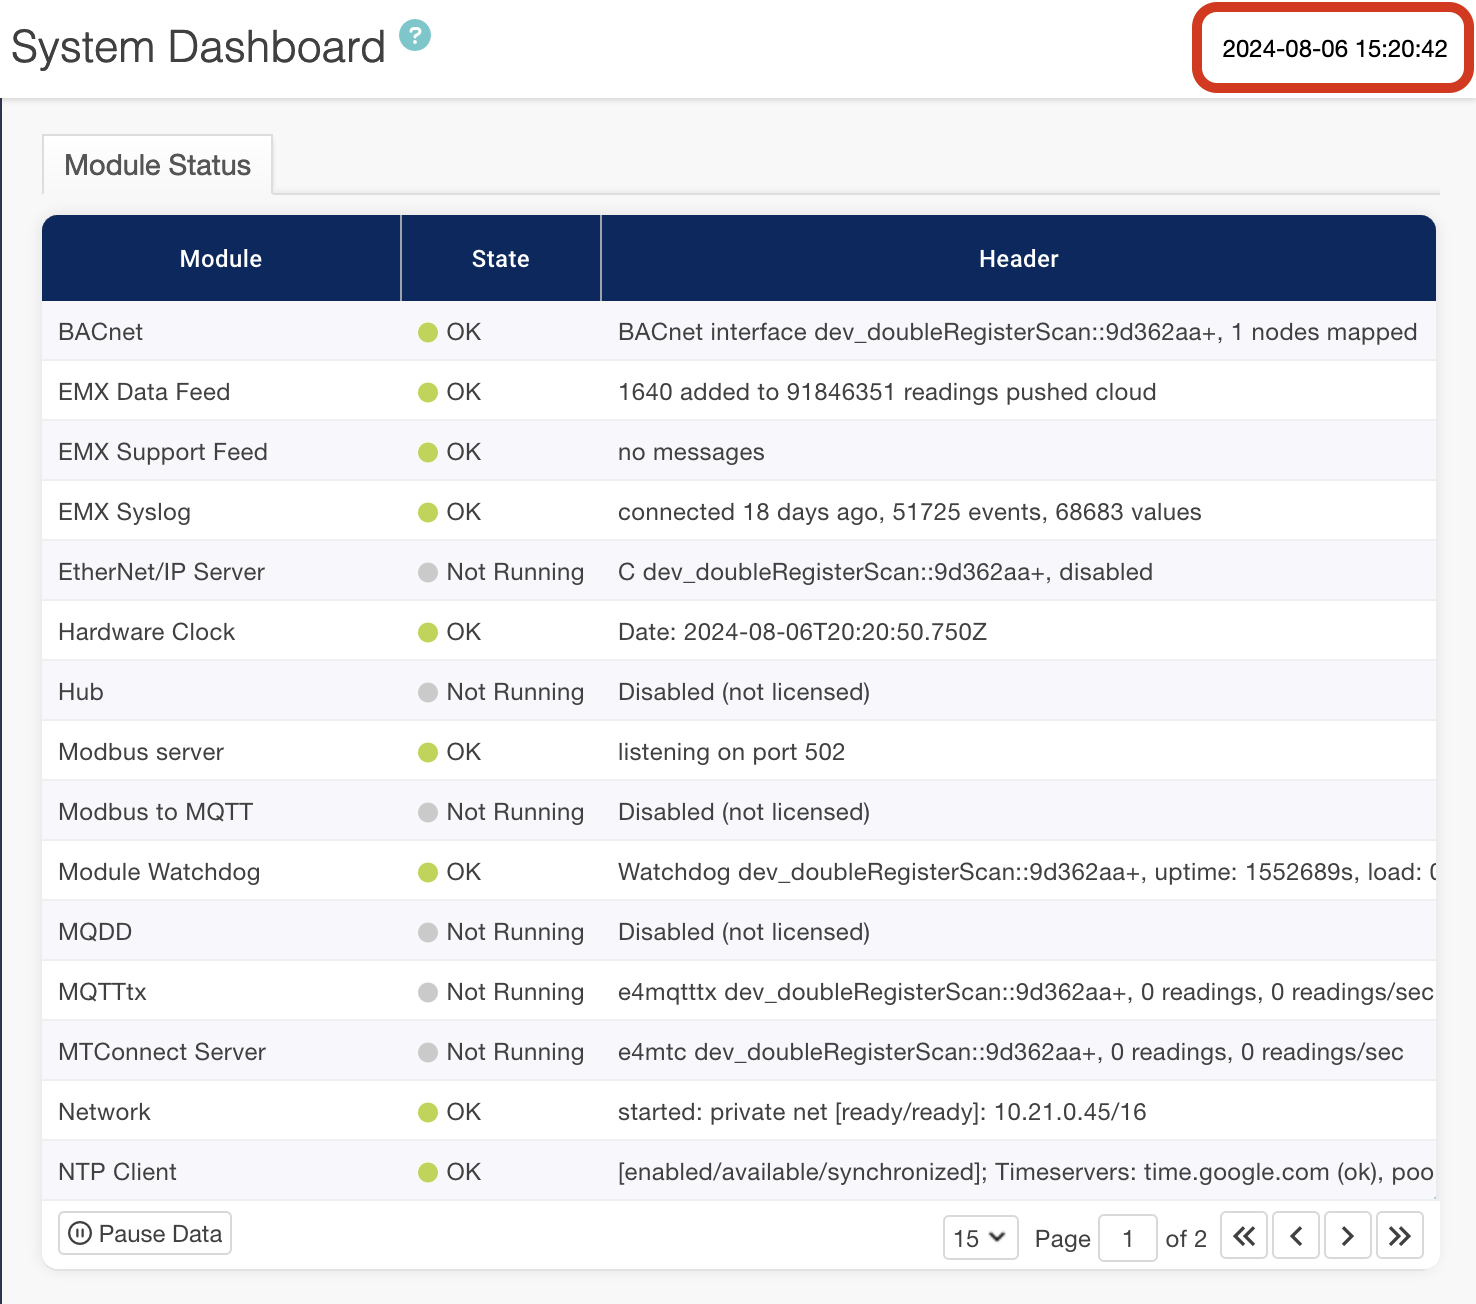
In order for the Gateway to have a proper time reference, an NTP server address is needed in the Time Synchronization Section.
The default time servers are 0.pool.ntp.org and 1.pool.ntp.org. Once a time server is entered confirm the time at the top right of console. For more information on available NTP servers see the NTP server section. The time will be expressed in the top right corner of the Console screen.
Selecting Data Destinations
Data Destinations configures how the Gateway delivers data. The Gateway can make monitoring data accessible via multiple formats :
-
EMX* Monitoring portal
-
Modbus TCP/IP
-
SNMP (versions 1,2 and 3)
-
MQTT
-
For more see Supported Protocols
Data can be provided simultaneously to the EMX Portal while serving other protocols such as Modbus TCP/IP or SNMP data.
Configure the data destinations following these steps:
-
Click on the Data Destinations tab on the left menu.
-
Select how you want to receive your data: EMX, Modbus, SNMP, etc.
-
Refer to the Supported Protocols support pages for more information
-
Select the desired EMX implementation type (cloud is default) for both “Monitoring Data Feed” and “Upgrade and Support Data Feed” sections.
For Cloud EMX:
-
Ensure that the Gateway’s IP address has outbound access to port 80 (HTTP) or 443 (HTPPS) for *.amazonaws.com
-
Confirm that cloud and support data feeds are enabled with the network manager
For Local EMX:
Enter the IP address of your server using port 8080 (e.g. //xxx.xxx.xxx.xxx:8080)
Before you can access your data via EMX make sure your Packet Power representative has set up an EMX account. See the EMX support section for additional details.
NTP Server
Please ensure you have an NTP server configured.
See: Setting an NTP Time Source For additional Instructions.