A 3D layout is a customizable and interactive 3D map of your Equipment Location. This functionality allows you to map entire server rooms and monitor data.
Navigating to 3D Layouts
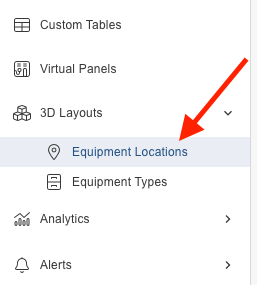
Go to 3D Layouts → Equipment Locations.
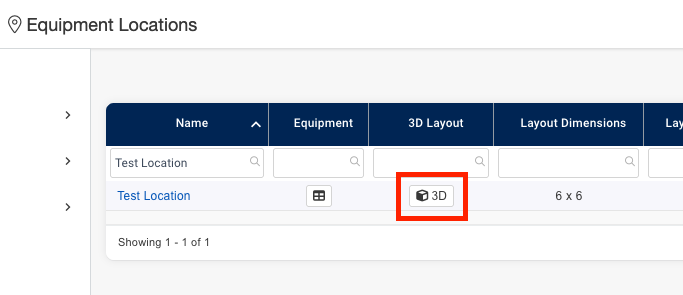
Click on a locations 3D Layout button to enter the 3D Layout for that location.
Navigating a 3D Layout
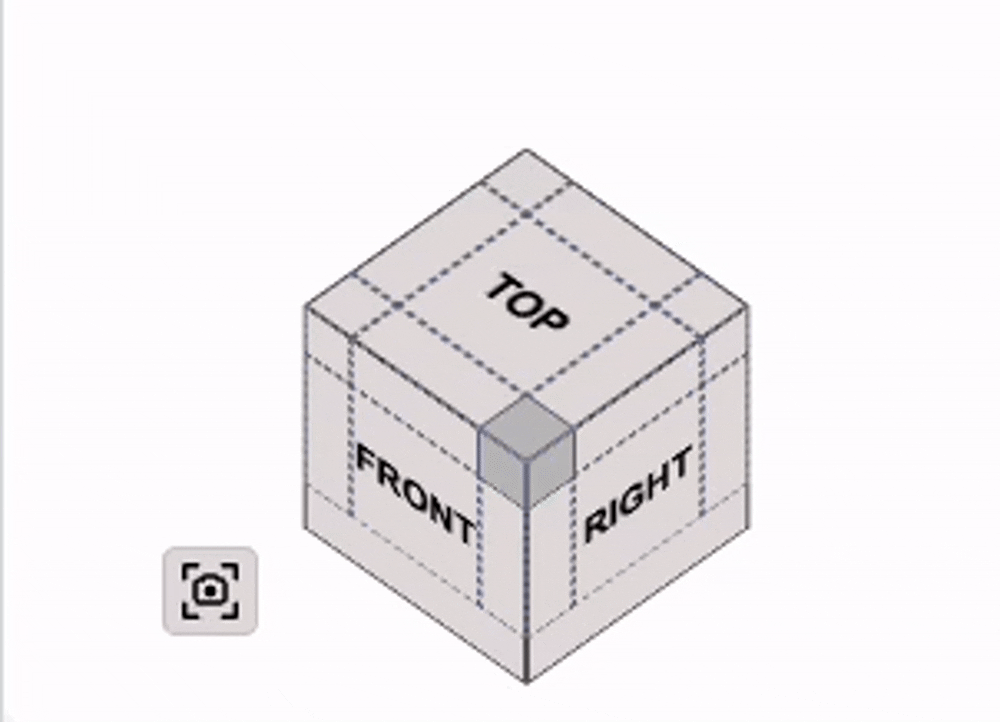
Use the navigation cube to quickly Orient your 3D Room clicking one of the faces, edges, or corner zones. Click the camera Icon to fit your layout to the screen.
Drag anywhere on the screen to rotate your layout.
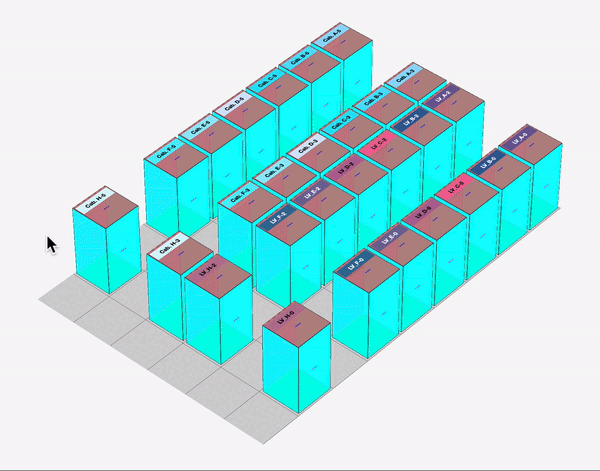
Click and drag with Right click to pan your layout.
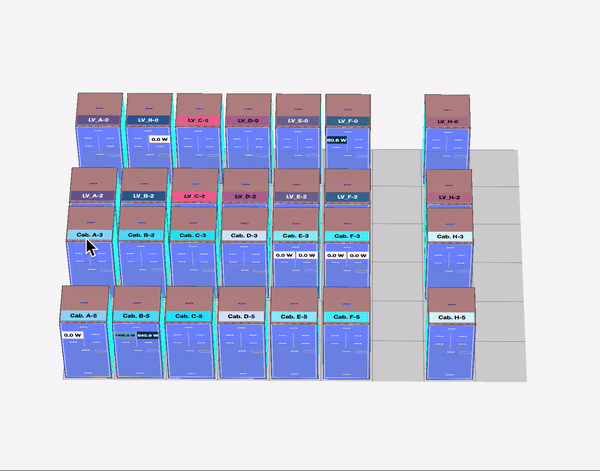
Use your mouse scroll wheel or use the pinch gesture on your trackpad to zoom in and out on your layout.
Editing a 3D Layout
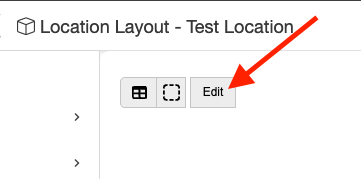
To start editing your Location Layout - click on Edit on the top left of the page.
Editing Layout Settings
Click the Settings Icon to adjust your layouts settings.
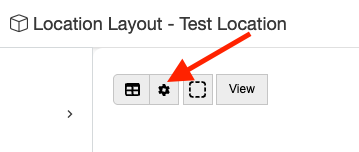
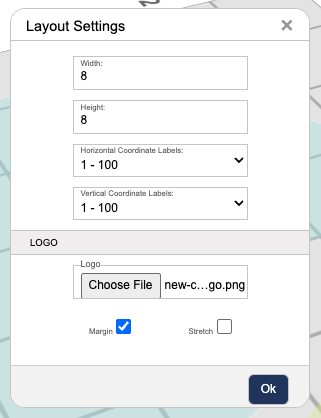
Here you can adjust your layouts dimensions, coordinate labels and floor logo. Click Ok to save.
Adding Equipment
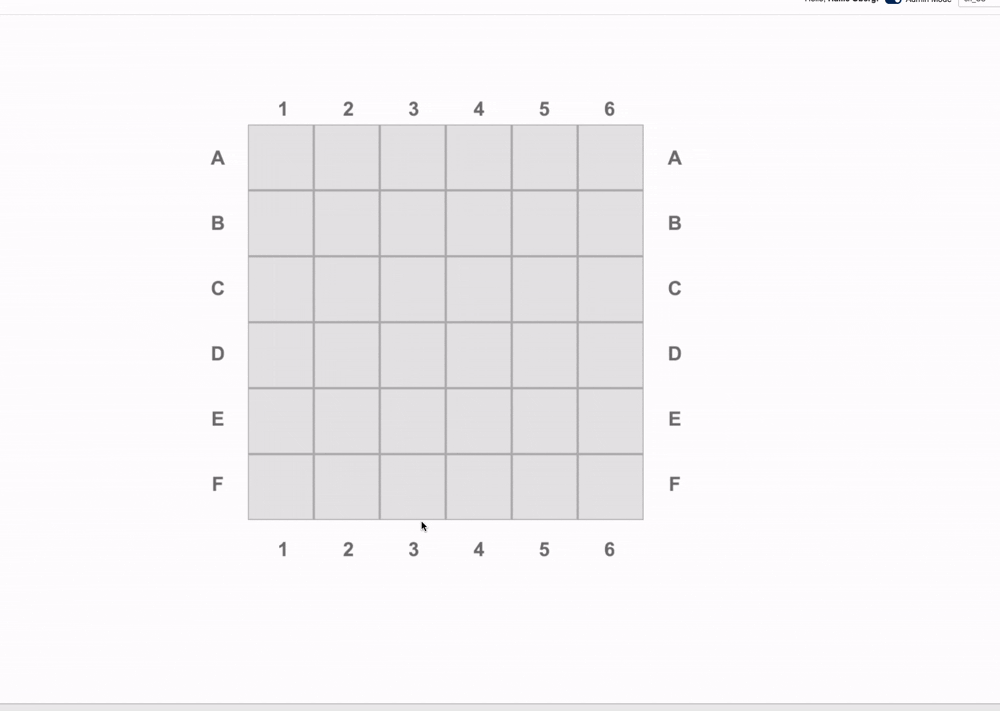
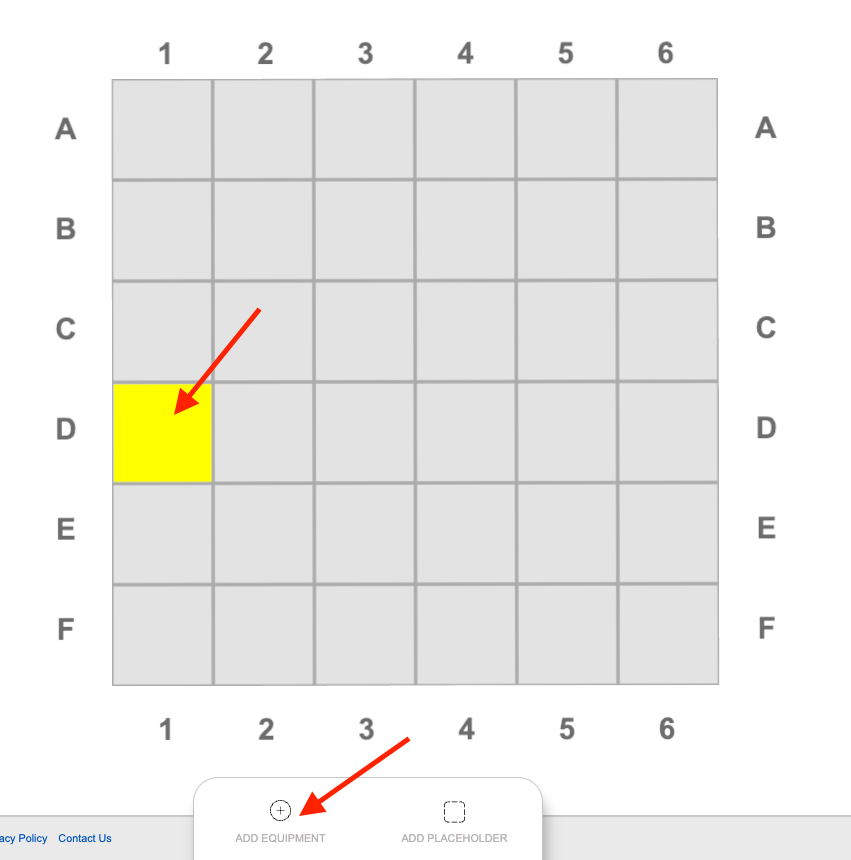
Select an empty grid space then click Add Equipment at the bottom of the page.
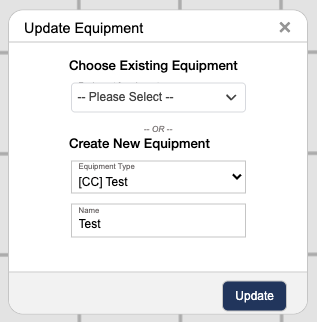
Select an existing equipment item already assigned to your layout or create a new equipment item by choosing the equipment type and adding a name. Then click Update.
Editing Equipment
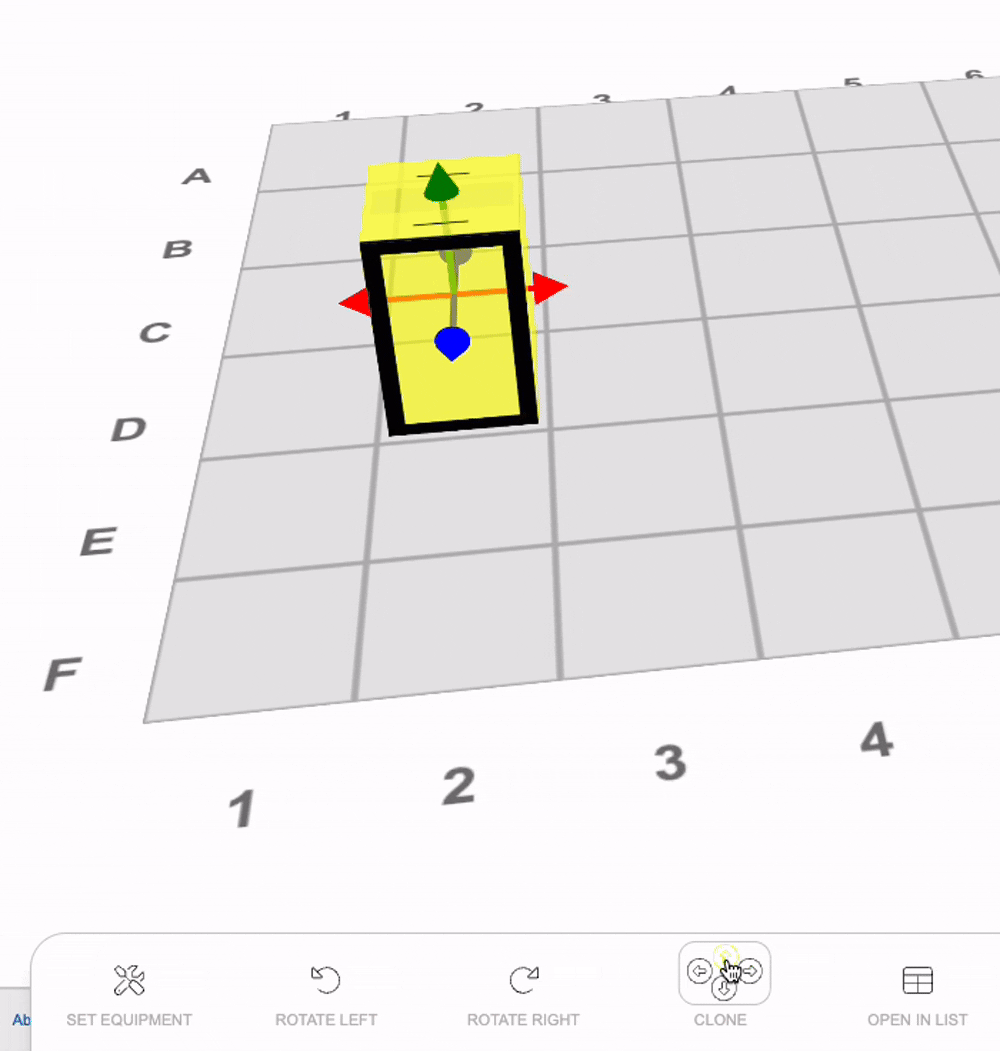
To edit an equipment item in your layout first click on a cuboid or select multiple cuboids with Ctrl click or Cmd click.
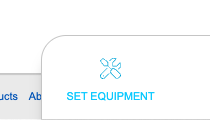
Click Set Equipment to edit or assign an equipment item to the selected cuboid.
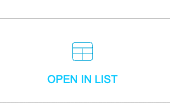
Click Open in List to view the selected equipment in your locations table.
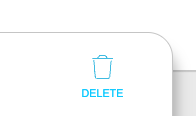
Click Delete to remove the selected equipment from your layout.
Moving and Resizing Cuboids
Click and drag on the arrows to resize the cuboid. Drag the cuboid or group of cuboids to move them.
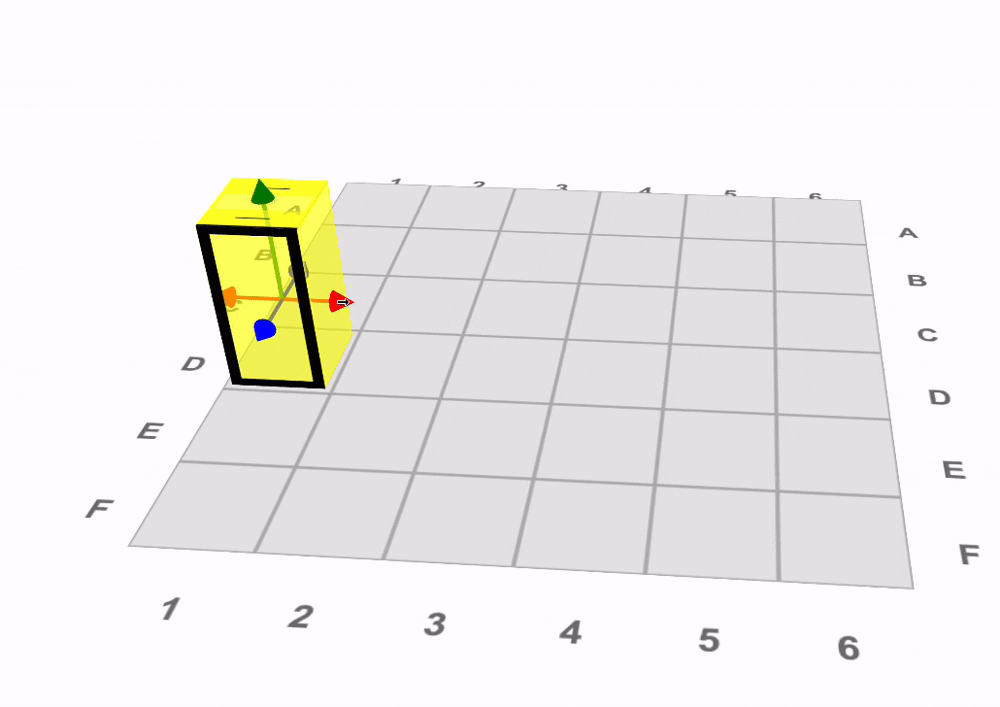
Click Rotate Left or Rotate Right to easily rotate the selected cuboid or group of cuboids.
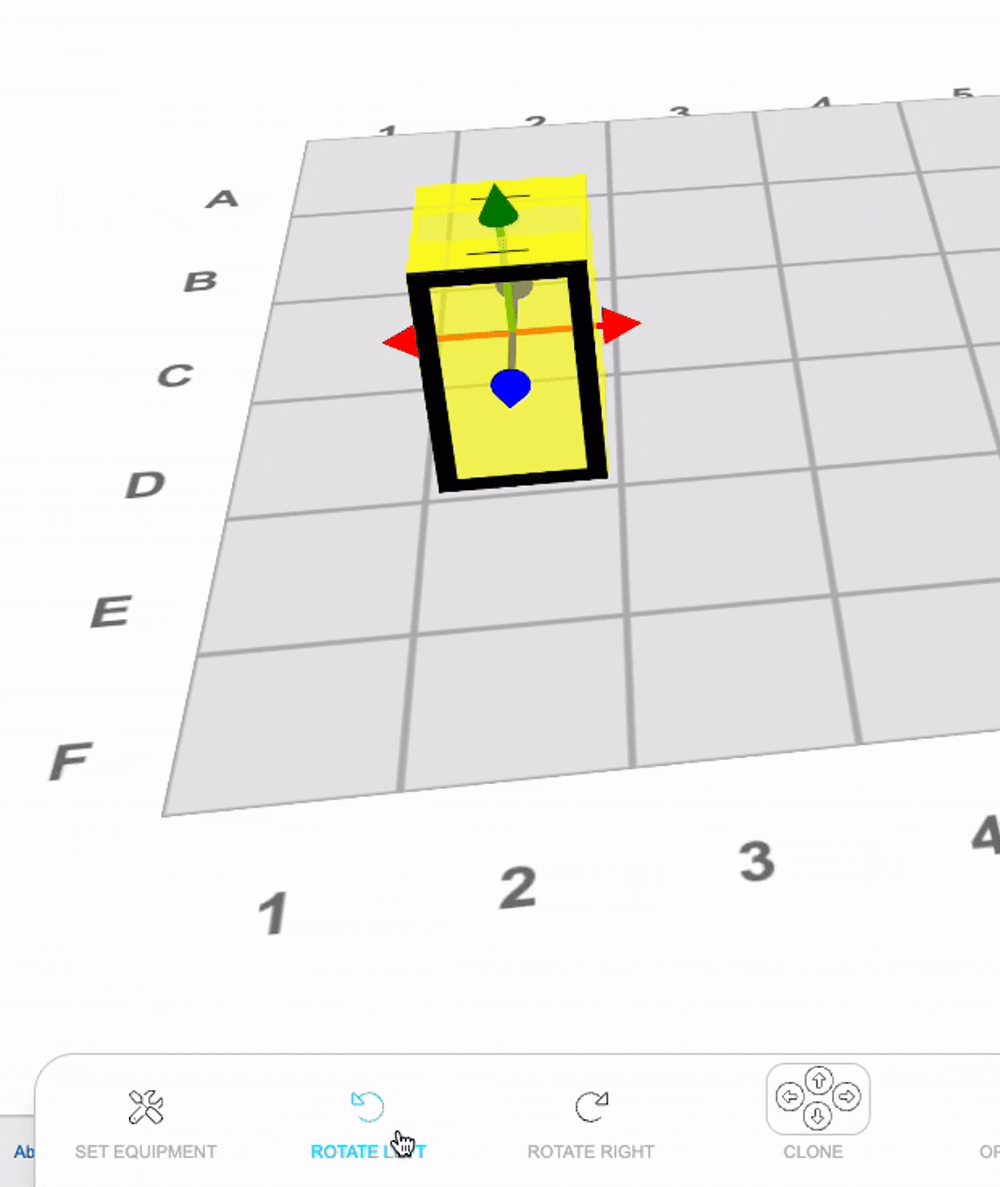
Use the Clone arrows to clone a cuboid in whichever direction you choose to make building layouts quicker.