

This page will show you a list of potential destinations and groups for alerts and other notifications. These Groups and Destinations are used for selecting who to notify on Node Alerts, Monitored Object Alerts, and Report Scheduling.
Adding Destinations
Destinations are an email or phone number (for SMS texts) that can receive alert messages.
-
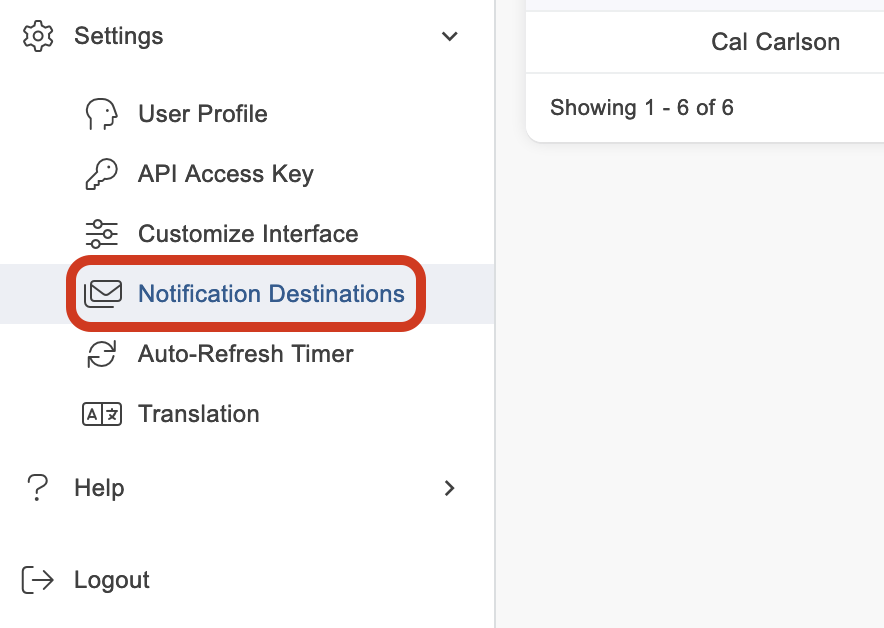
Navigate to Settings > Notification Destinations
-
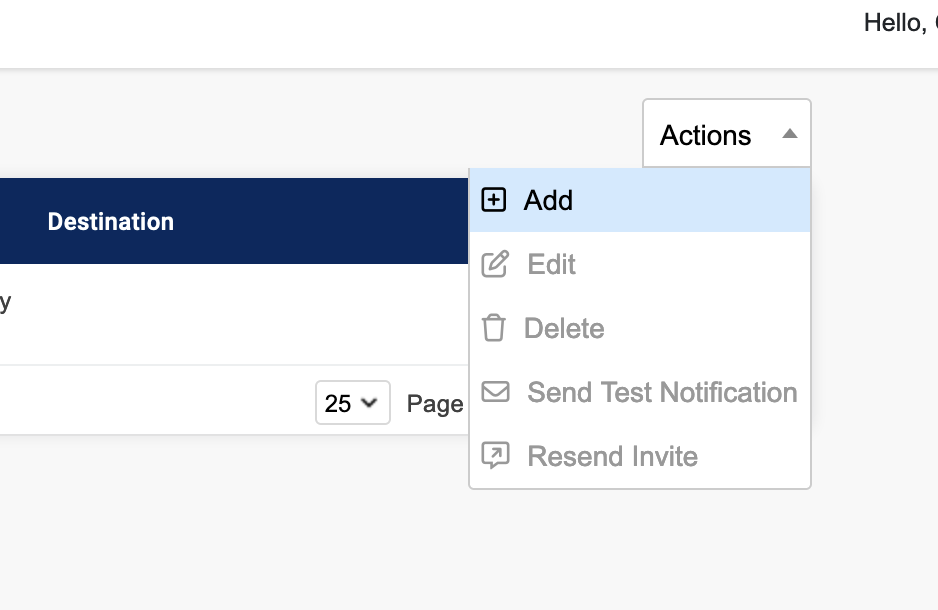
Click the Actions drop down in the upper right corner and select Add.

-
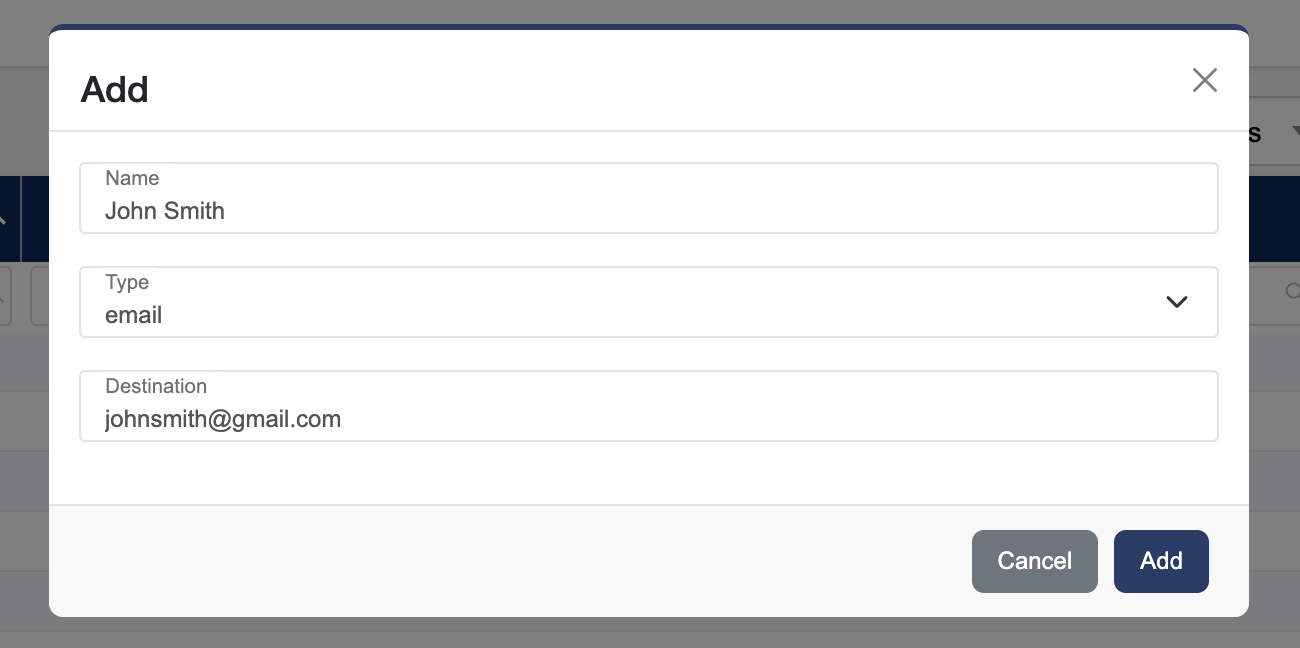
Name: Usually the name of the individual who will receive the notification, i.e. John Smith, etc.
-
Type: Choose email or SMS from the dropdown menu (if adding type Group see Adding Groups below). Nothing will appear in the drop down menu if messages have not been allocated to the account. Contact support@packetpower.com if this occurs.
-
Destination: Enter the email address for Email type or a phone number for SMS type. If using SMS, the entire phone number should be entered including country code (i.e. 1 for USA, 44 for UK) but excluding any "0s" that may precede the country code.
-
Click the blue Add button to submit.
-
After an Email or SMS destination has been added an invite will be sent to that destination. The receiver must verify they are accepting to receive notifications from EMX in order to be added to Groups or receive any notifications. You can see the status of this in the status column of the table. To resend an invite select the destination, click the Actions drop down and select Resend Invite. (Invites cannot be sent to groups).
-
To send a test notification to a SMS or Email destination select the destination, click the Actions drop down and select Send Test Notification. (Test notifications cannot be sent to groups).
-
Repeat to add additional destinations.
Adding Groups
Groups are collections of destinations.
-
Navigate to Settings > Notification Destinations
-
Click the Actions drop down in the upper right corner and select Add.
-
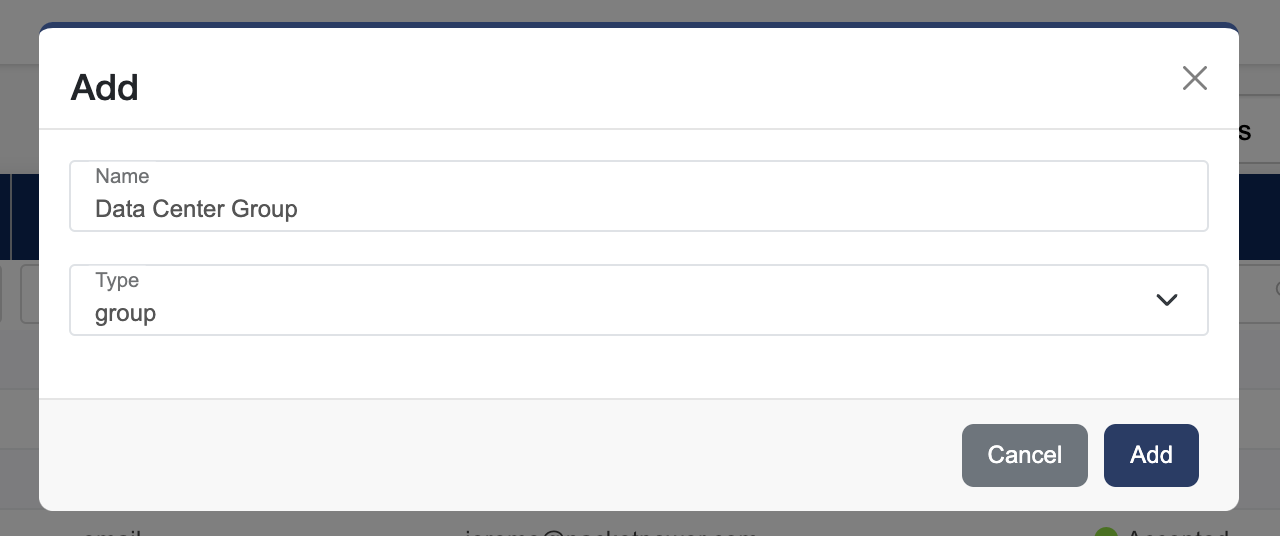
Name: Usually the name of the Group who will receive the notification, i.e. Acme Data Center Operations, etc.
-
Type: Choose group from the dropdown menu.
-
Click the blue Add button to submit.
-
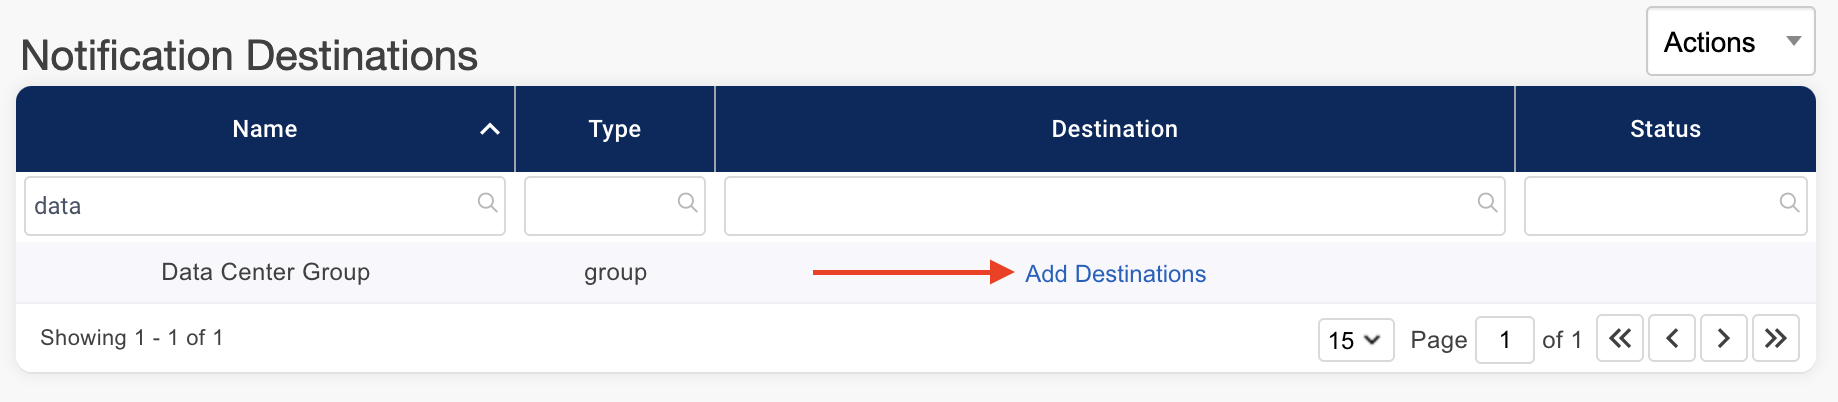
After a group has been added, you can add destinations to the group by clicking Add Destinations in the Destinations column.
-
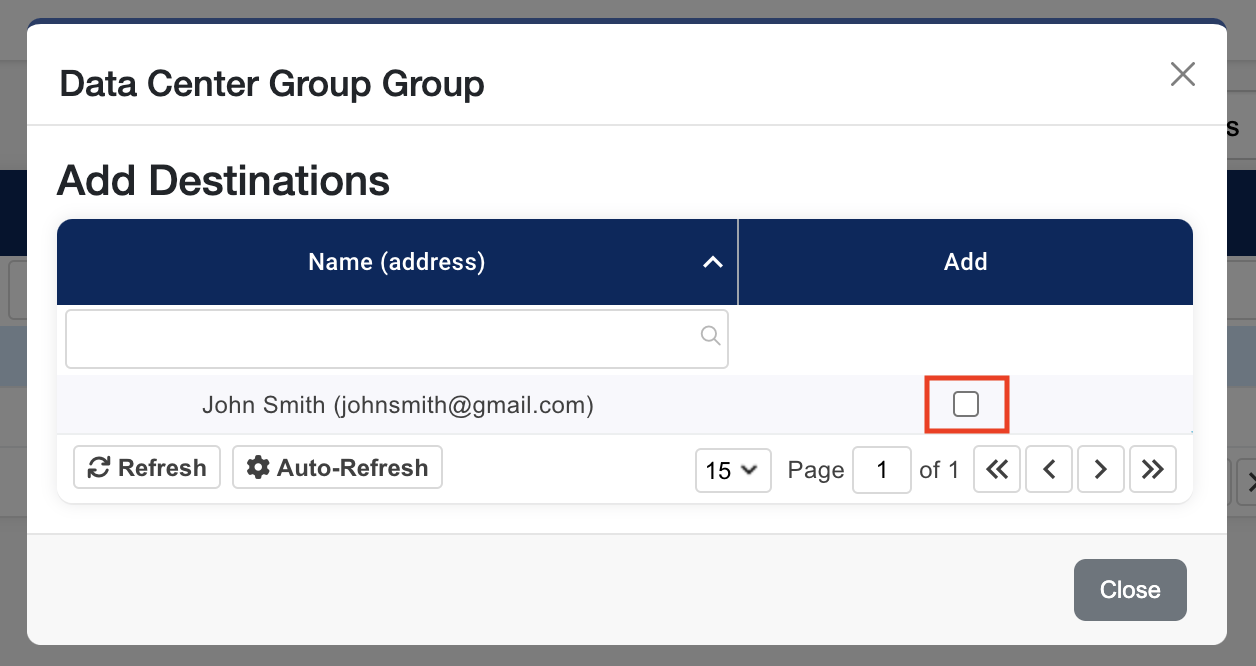
This will pop up a list of destinations that have been accepted (see Adding Destinations above for more information on Status). To add a destination to this group check the Add checkbox.
-
Check as many destinations as you want to add then click Close.
-
To remove a destination from a group uncheck the Add checkbox.
-
Repeat above steps to add additional groups.