

This guide provides instructions for integrating a Packet Power Wireless Network Connector (WNC) with a Server Technologies (ST) Power Distribution Units (PDUs) that feature PIPS® sensing capabilities. This guide is applicable to PDUs that cannot be factory reset.
Installation Process
Identify PDU
This guide applies to the following PDUs:
|
ST PDU Model # |
Firmware version |
|---|---|
|
C2W48TE-YQME2M99 |
8.0X, 8.0Y, 8.0Z |
|
C2W42CE-YQME2M00 |
Configure PDU
None
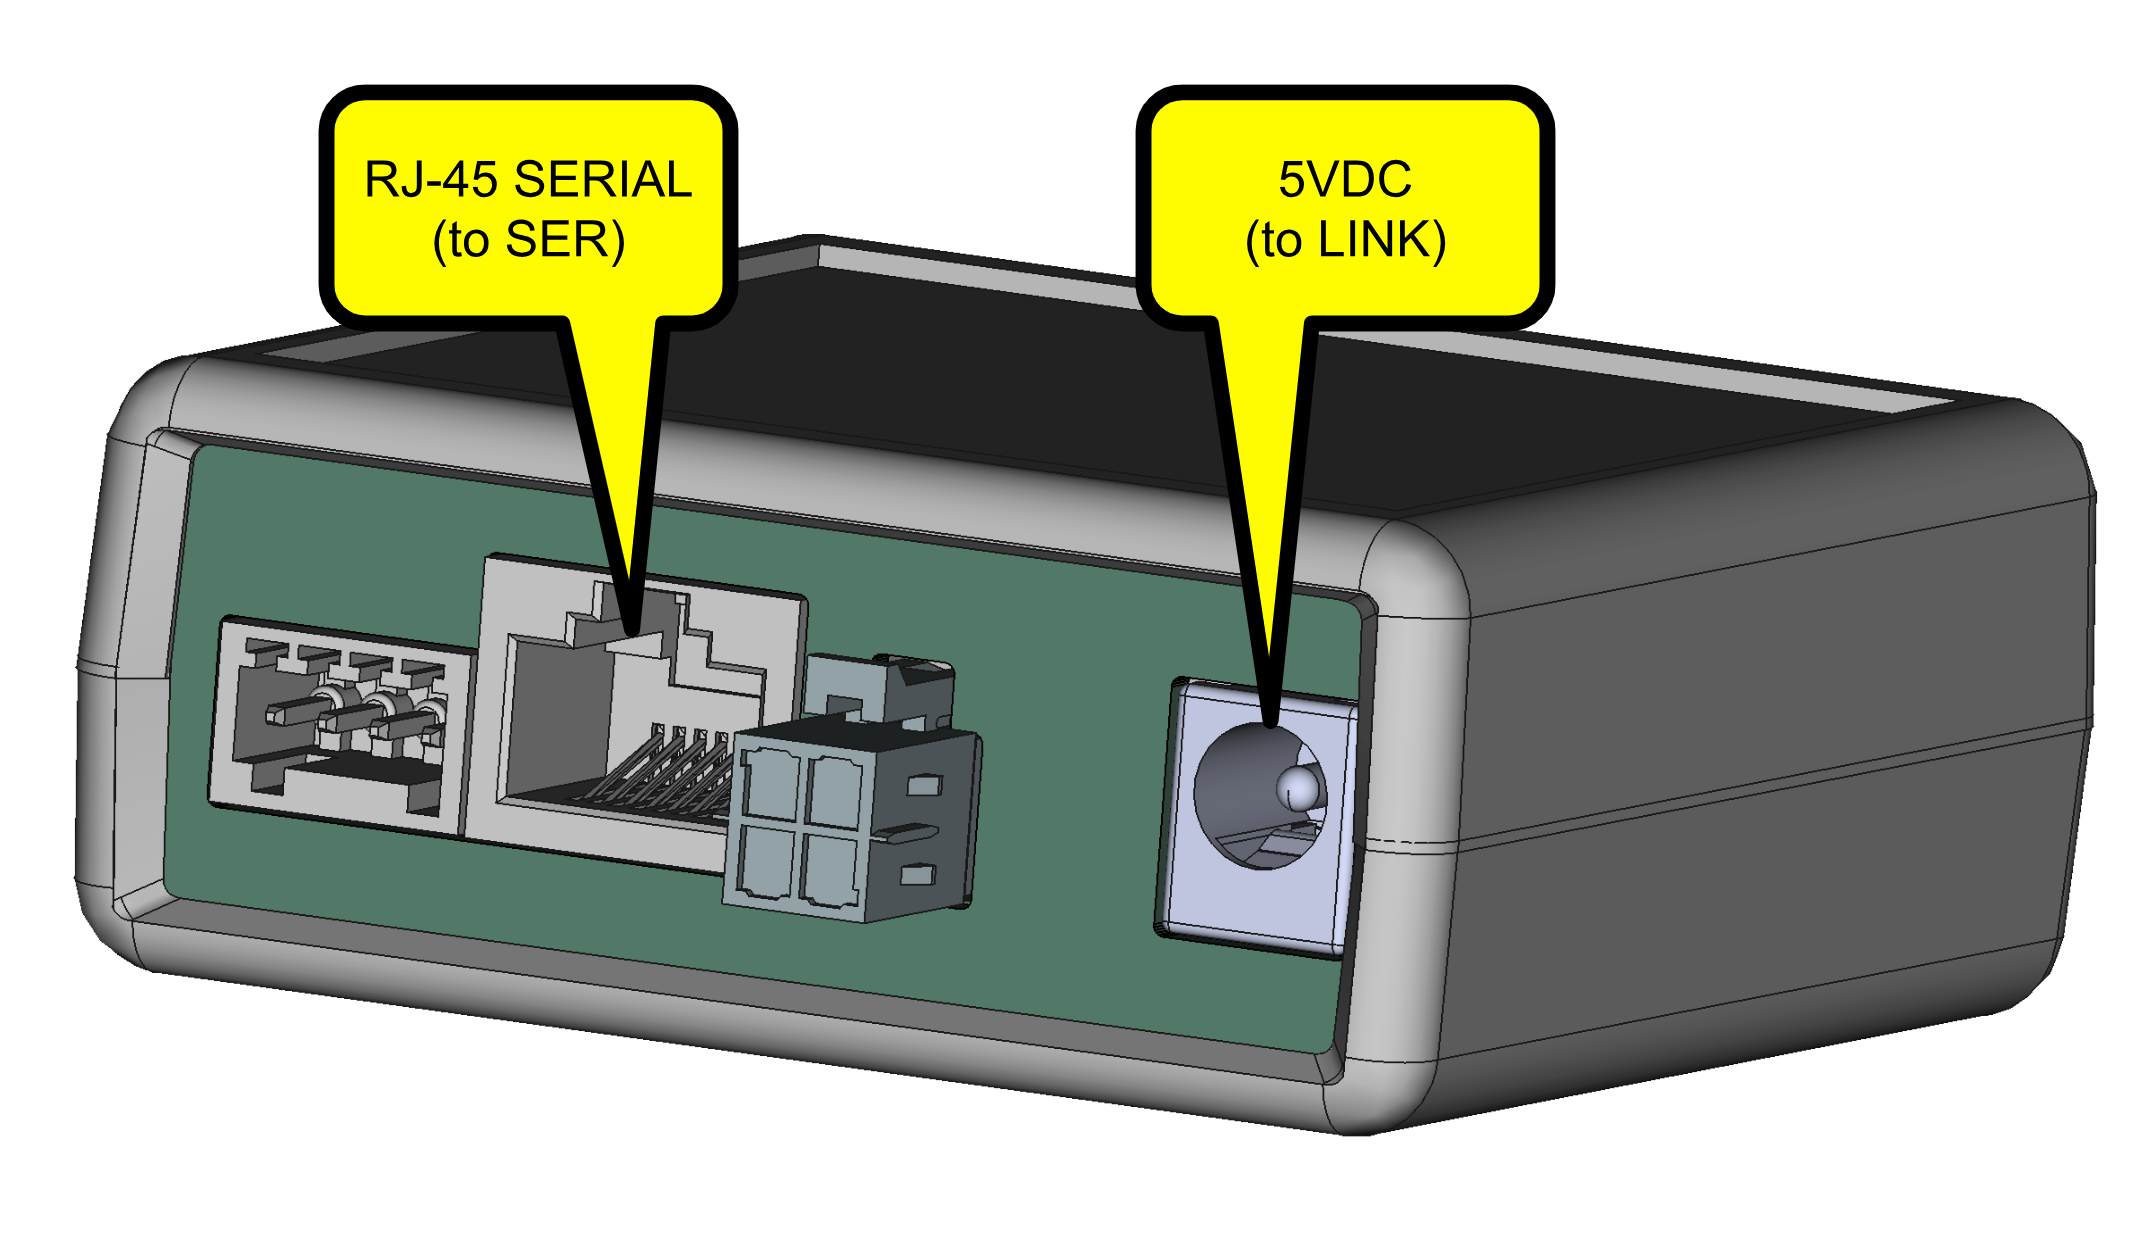
Connect WNC to PDU
-
Connect ethernet cable into the WNC RJ-45 SERIAL port.
-
Connect plug side of WNC power cable into the WNC 5VDC power jack.
-
Connect the other end of ethernet cable into the Server Tech PDU’s
SERport. -
Connect the other end of the WNC power cable into the Server Tech PDU’s
LINKport.
.png?cb=616bba10e79c118e5a3d7aeddd19922d)
.png?cb=b1c71360cc0c26a7ec52c21129e5a029)
Verify Connection
-
The WNC Display rotates through messages periodically after power-up.
-
One minute after WNC power-up, watch the display for a
State:Pollmessage, which indicates a successful connection.
Verify Readings
-
Use the Packet Power Gateway Web Console to verify that readings are being received.
-
Expect gauges and readings in 15 minutes.
-
Expect all readings in 60 minutes
-
Readings will be associated with the 16 hex digit identifier printed on the WNC QR code.
The following readings should appear and update approximately every 60 minutes:
|
Channel |
Description |
|---|---|
|
Current A |
phase A current |
|
Current B |
phase B current |
|
Current C |
phase C current |
|
Voltage A |
phase A voltage |
|
Voltage B |
phase B voltage |
|
Voltage C |
phase C voltage |
|
Power A |
phase A power |
|
Power B |
phase B power |
|
Power C |
phase C power |
|
Energy A |
phase A accumulated energy |
|
Energy B |
phase B accumulated energy |
|
Energy C |
phase C accumulated energy |
|
Contact 1..3 |
breaker 1..3 status, 0=tripped, 1=normal
|